FastTrack Claims Workflow Guide
Follow this guide to learn how to use FastTrack to call payers and do claims follow up and status check calls.
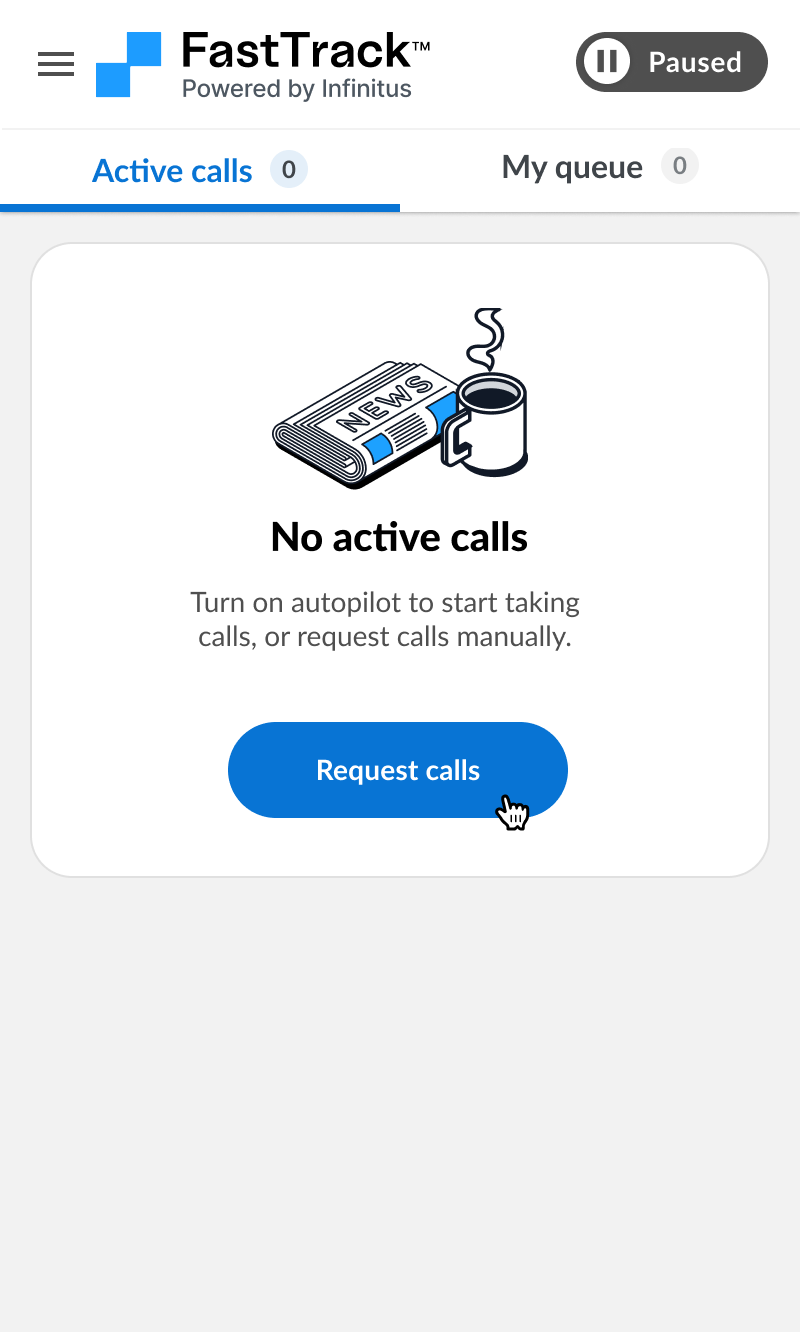
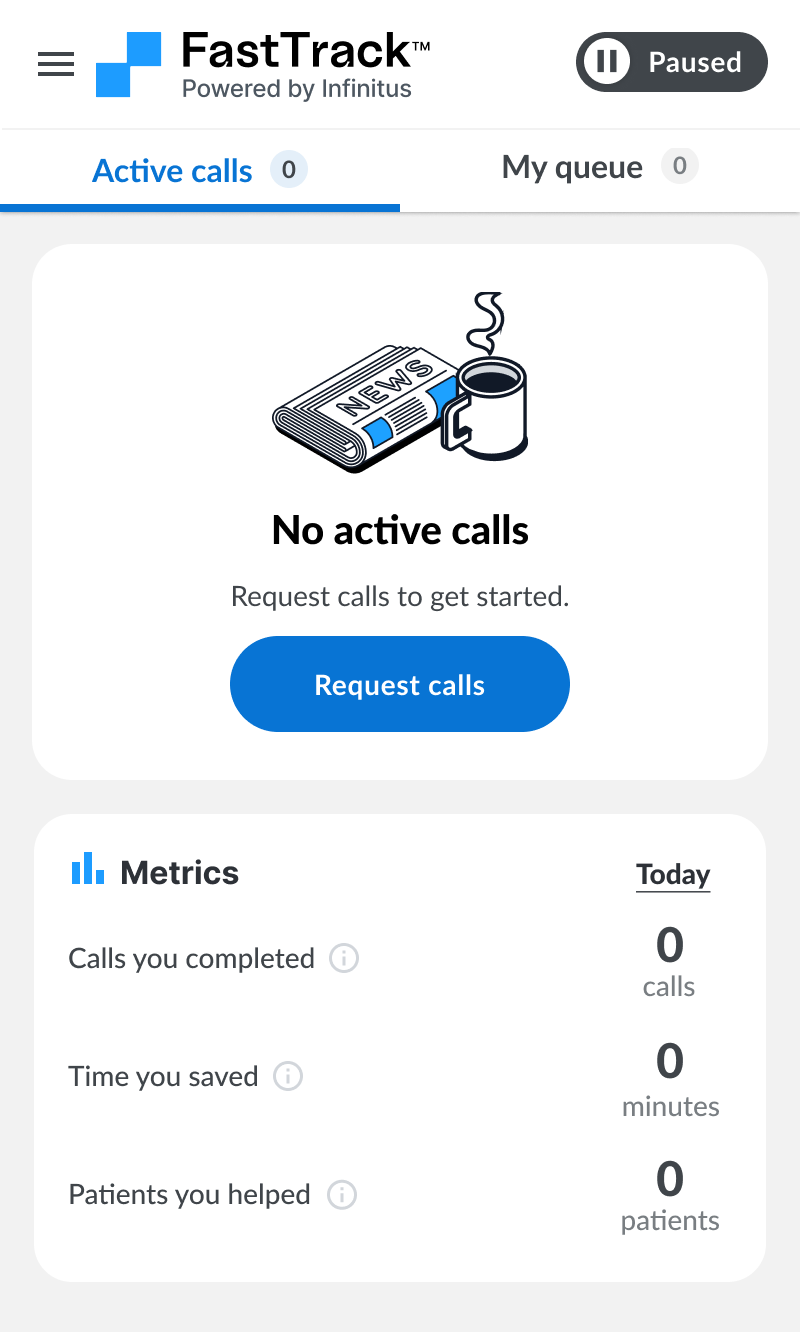
Requesting calls into your queue
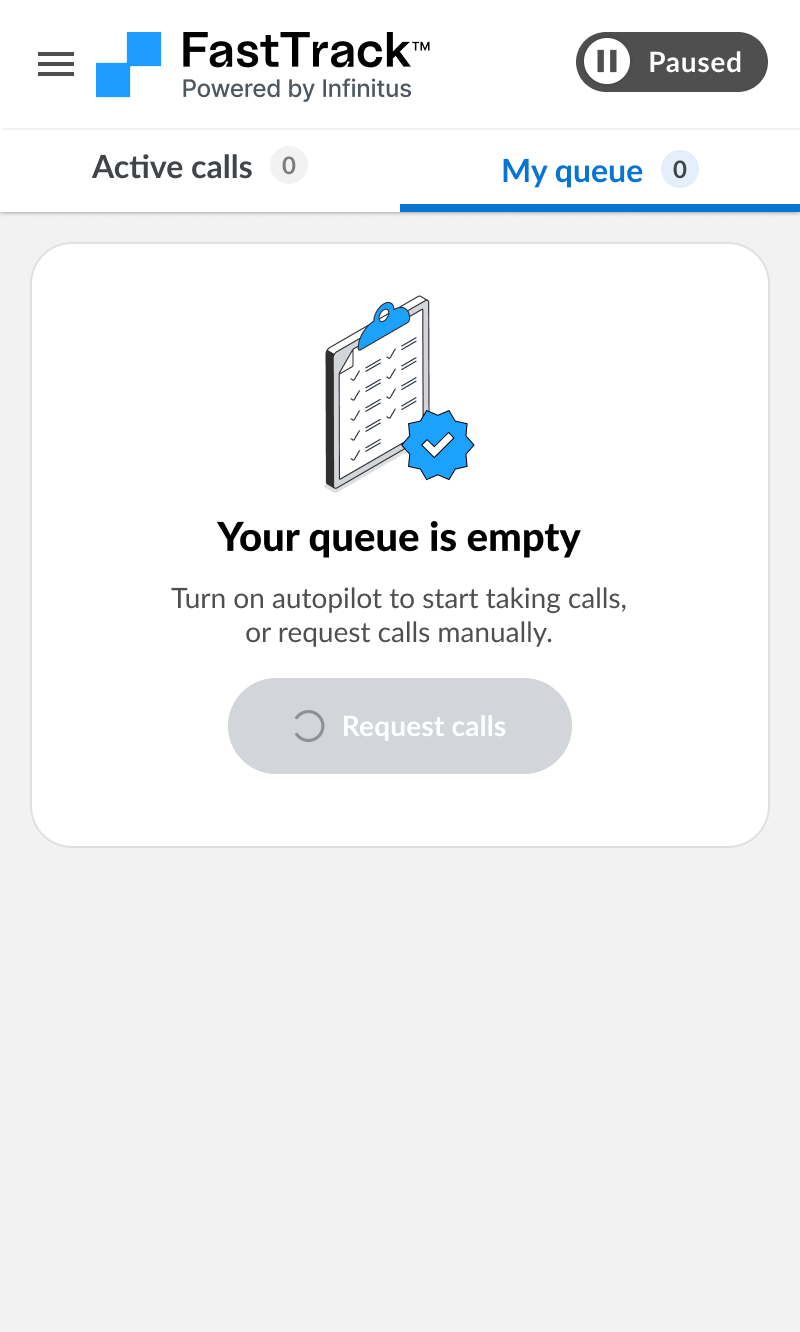
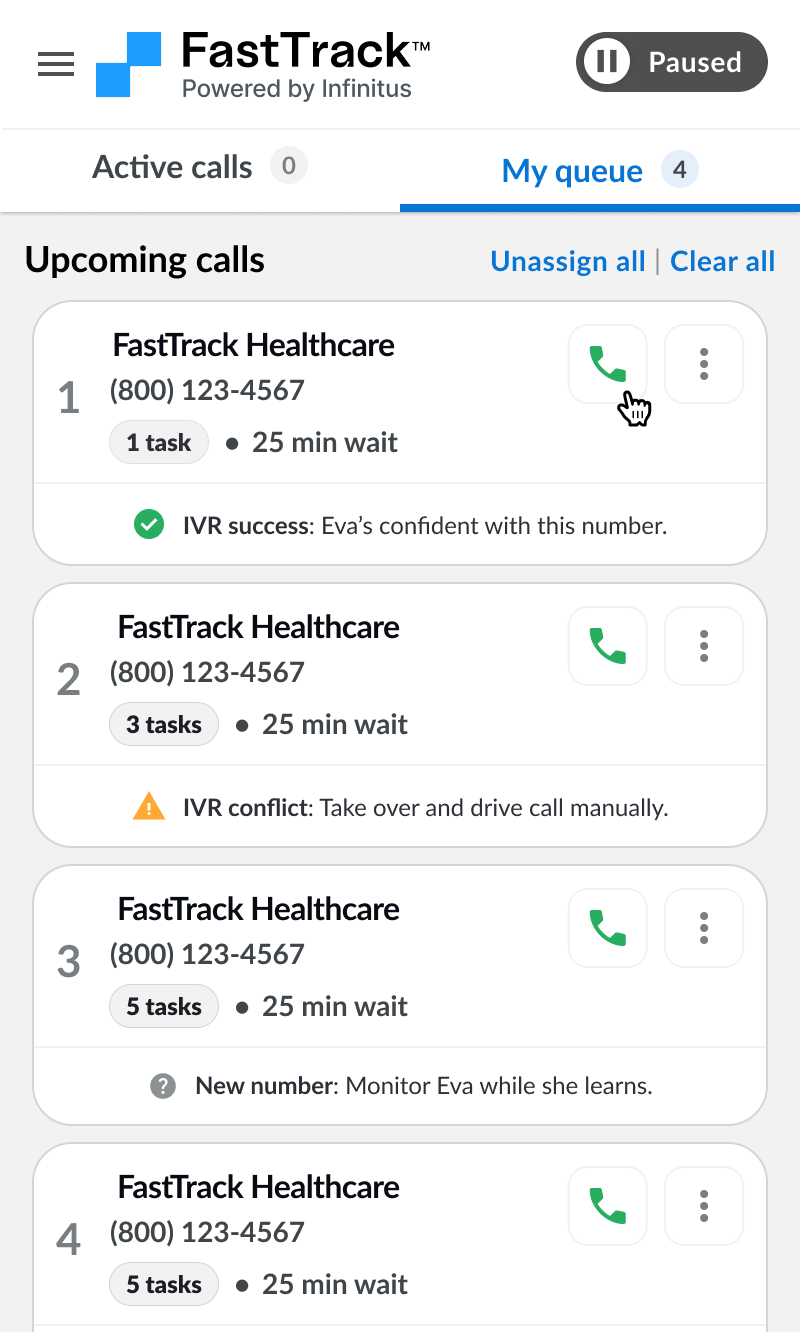
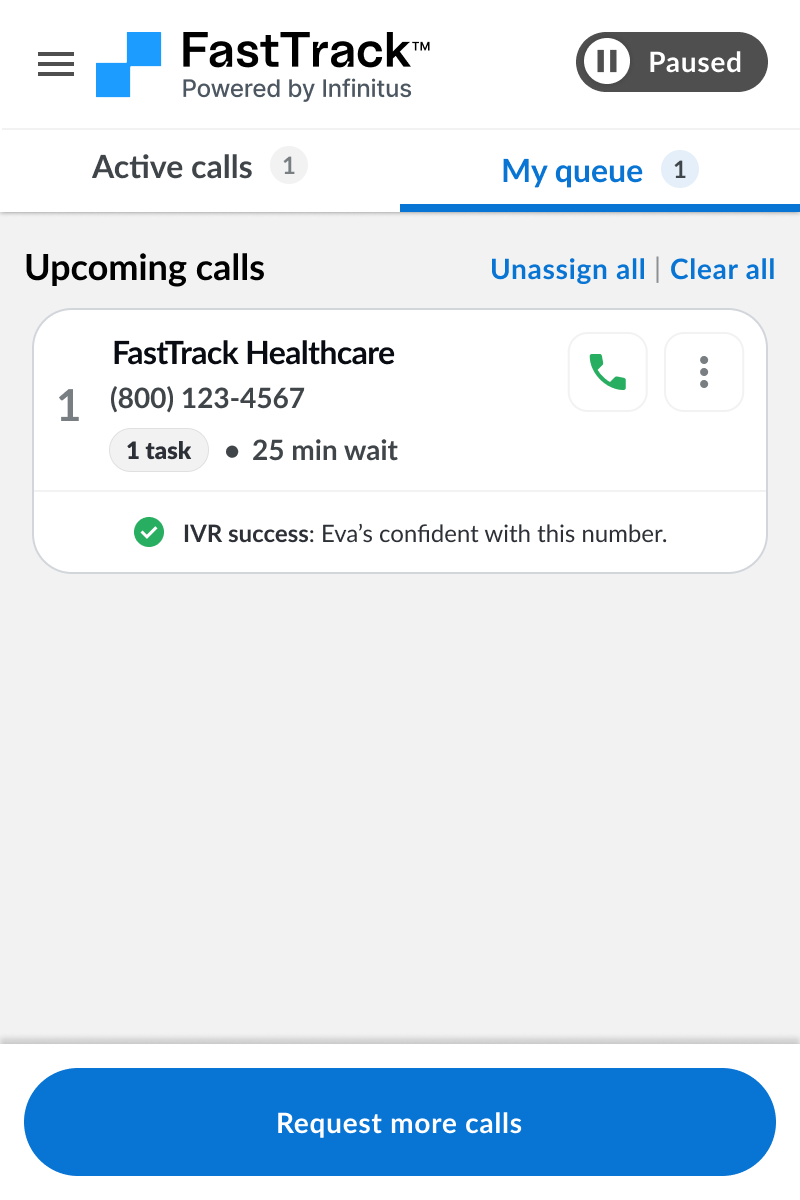
When you first sign into FastTrack your queue will be empty. Click the “Request calls” button to get calls added to your queue. Calls will be automatically grouped by matching phone number and prioritized by priority score (from high to low) in your “My queue” tab.
When you are ready to start a call you can click the green phone button on a call.
Request calls when you first sign in
FastTrack will find you available calls
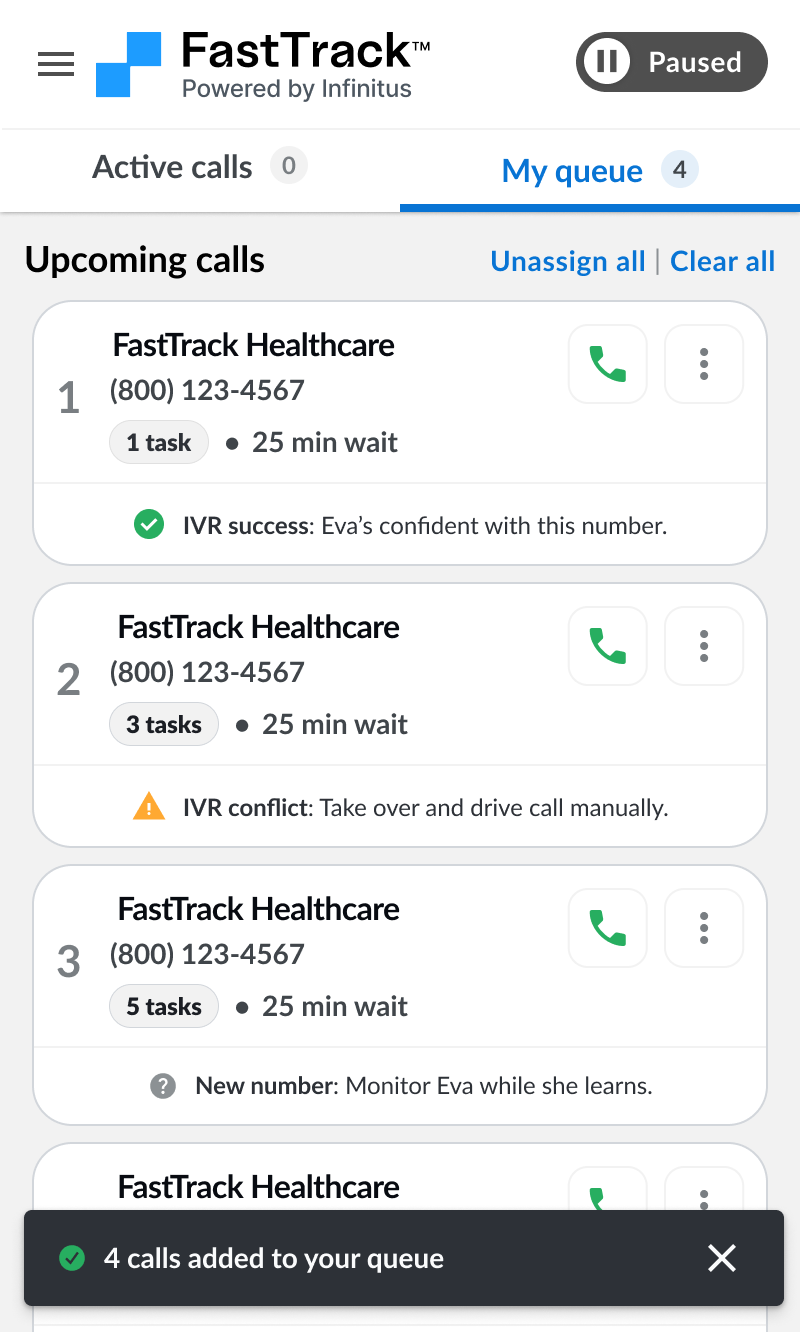
FastTrack will assign up to 10 calls at a time
Start your first call when ready
Re-filling your queue
When you run out of calls you need to request new calls to continue. Just click the “Request calls” button again to get new prioritized calls assigned to your queue.
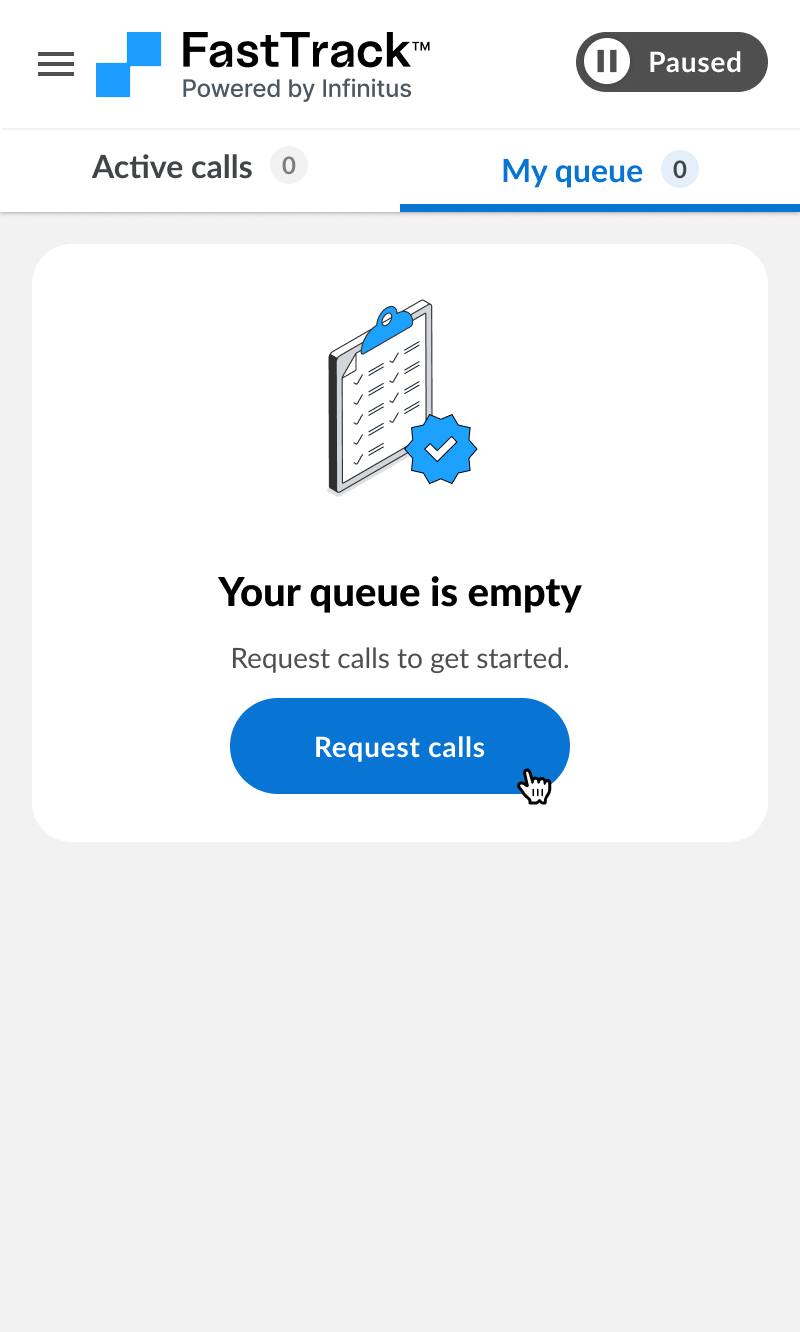
Access your queue
Click the “My queue” tab at any time to access your call queue.

Copy all task IDs on a call
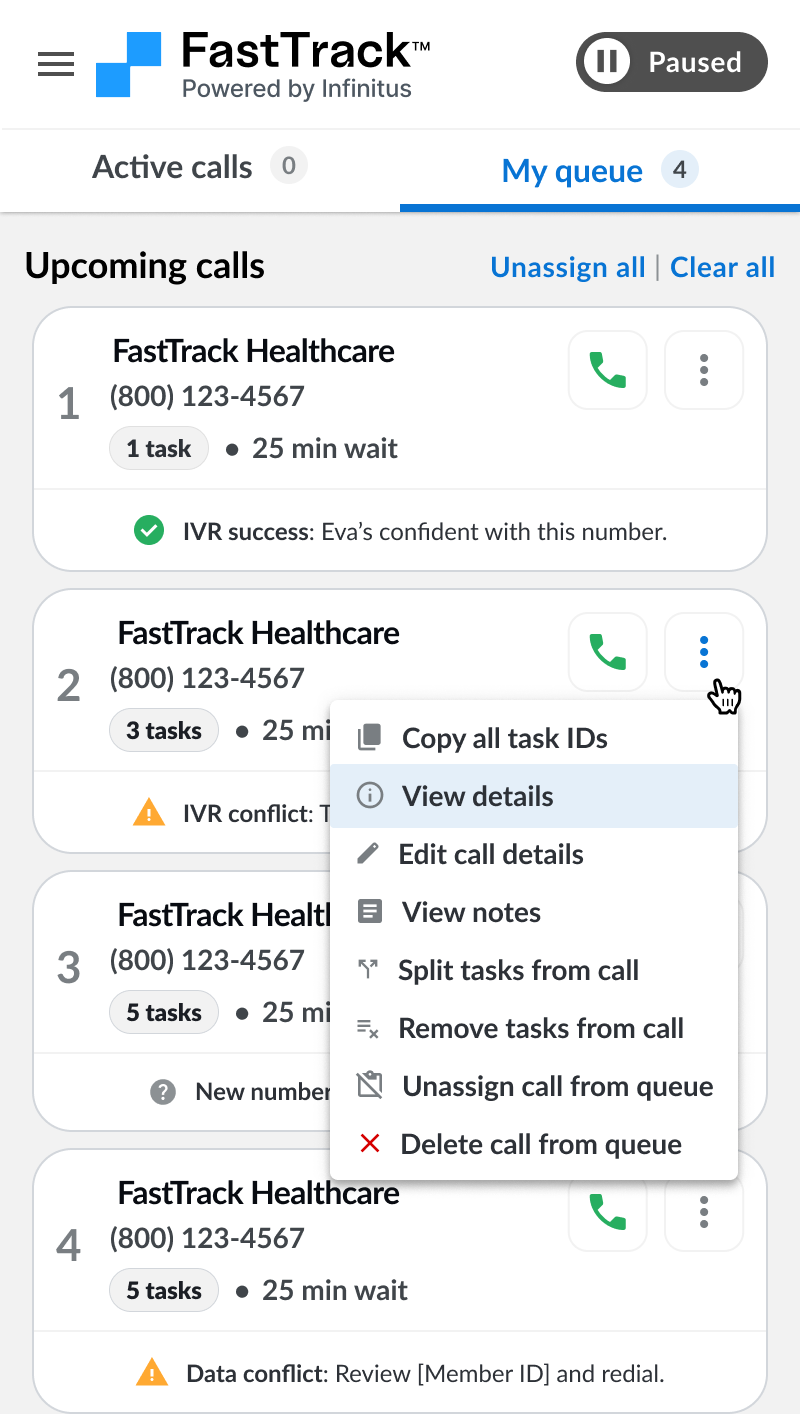
Each call may contain 1 or more “tasks” to work on it. Each task represents a work item (aka account, case, etc.) in your work system. You can click the “Copy all task IDs” option in the call dropdown menu to copy all of the task IDs to your clipboard. These task IDs can be used to look up the work item in your work system.
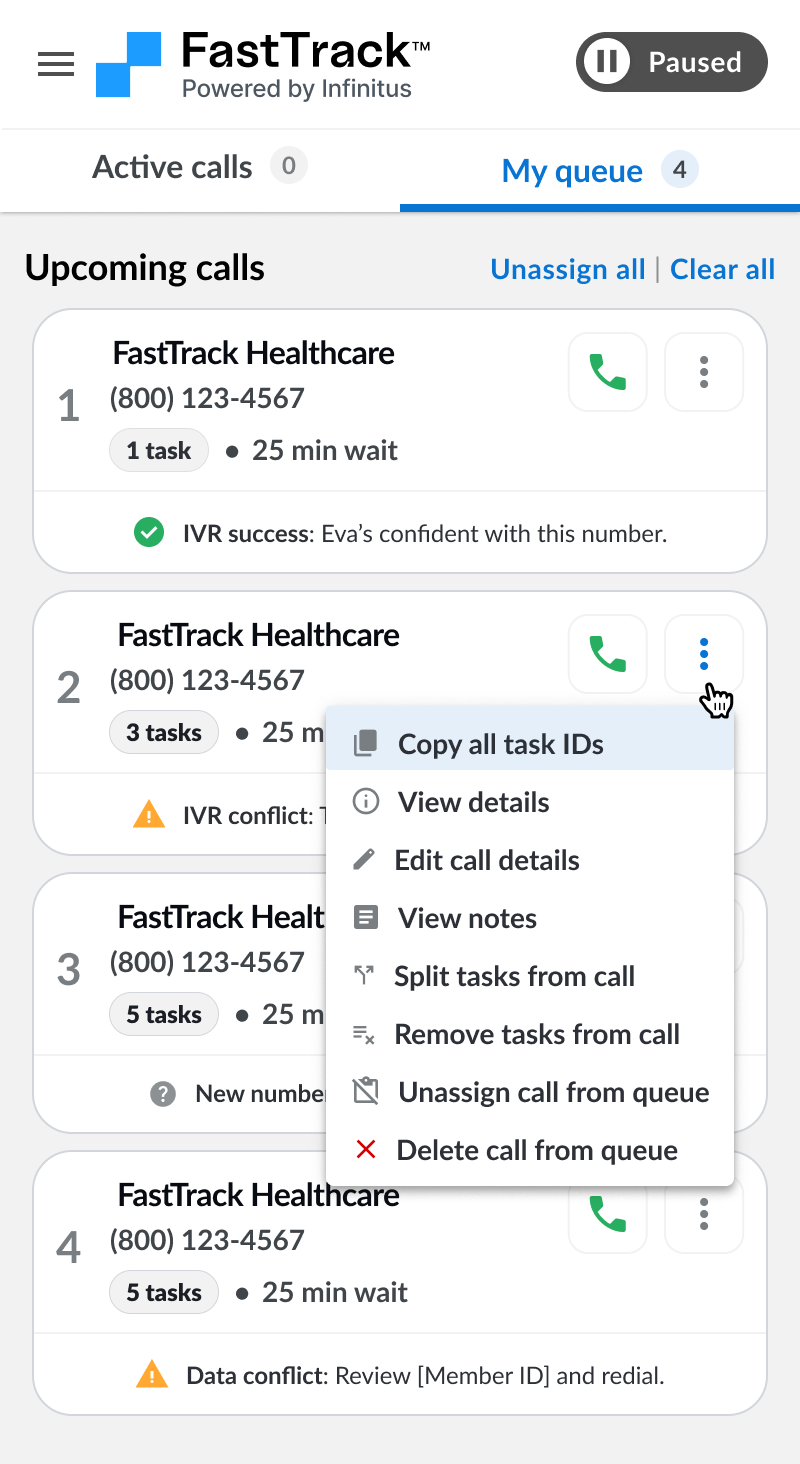
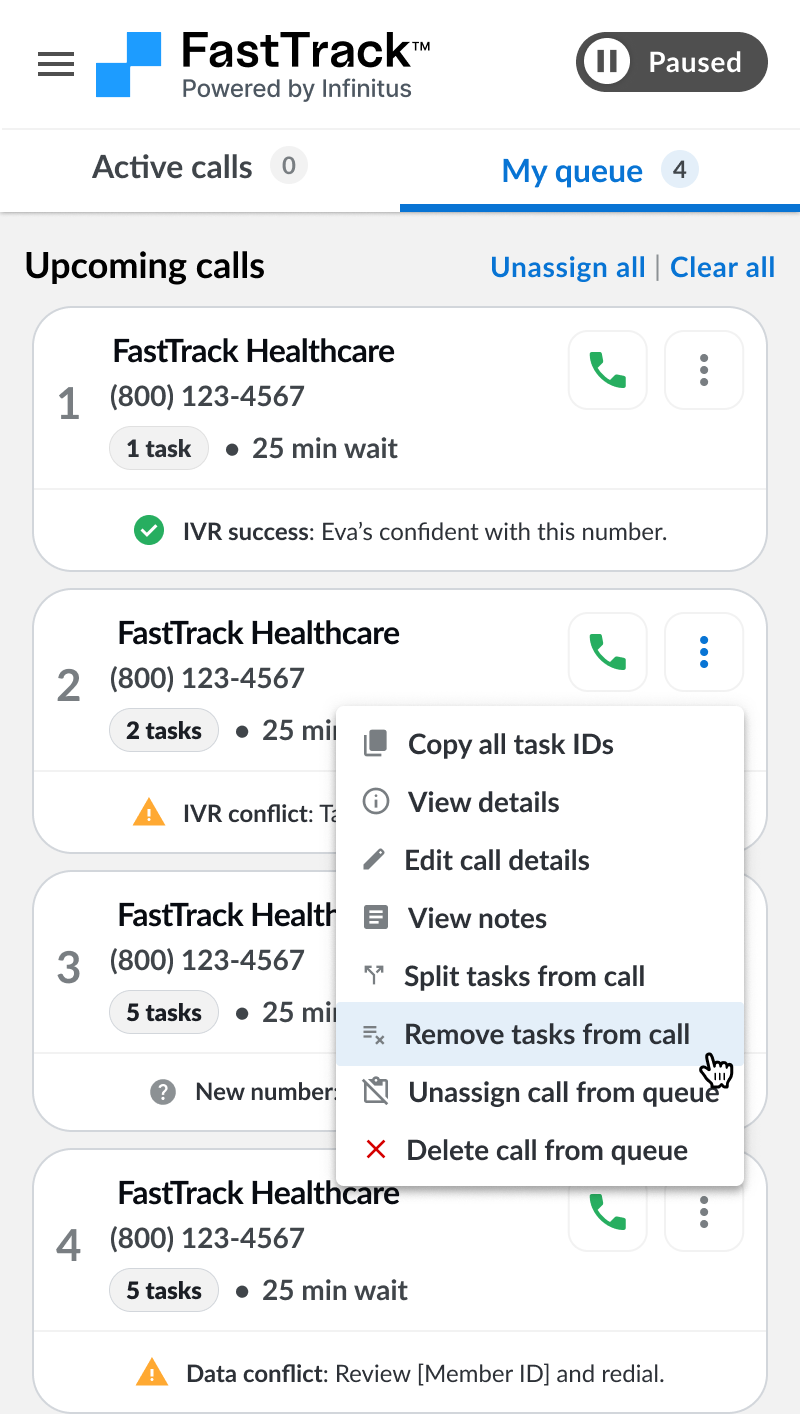
Use the menu button on each call card for additional actions.
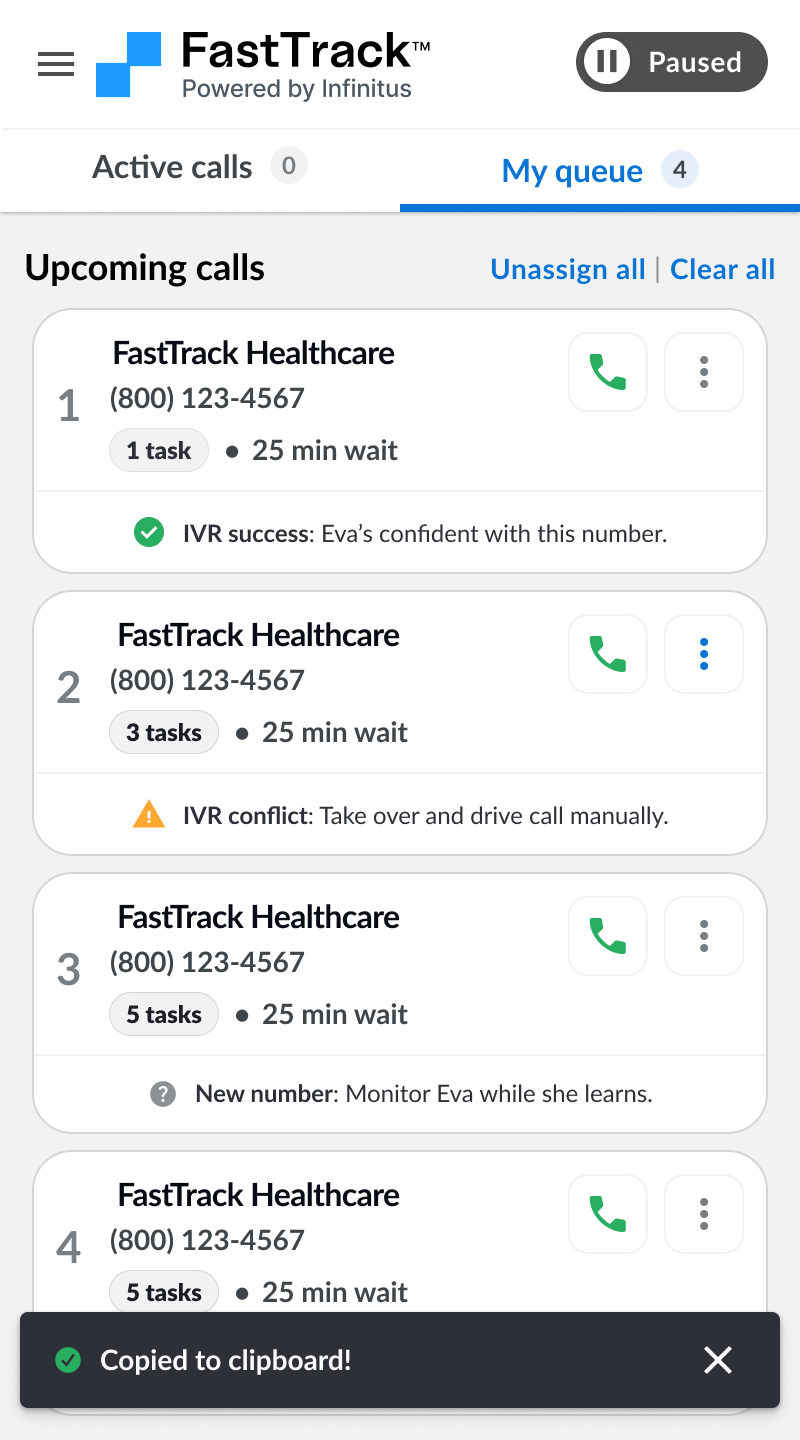
Copy all task IDs will automatically copy them to your clipboard.
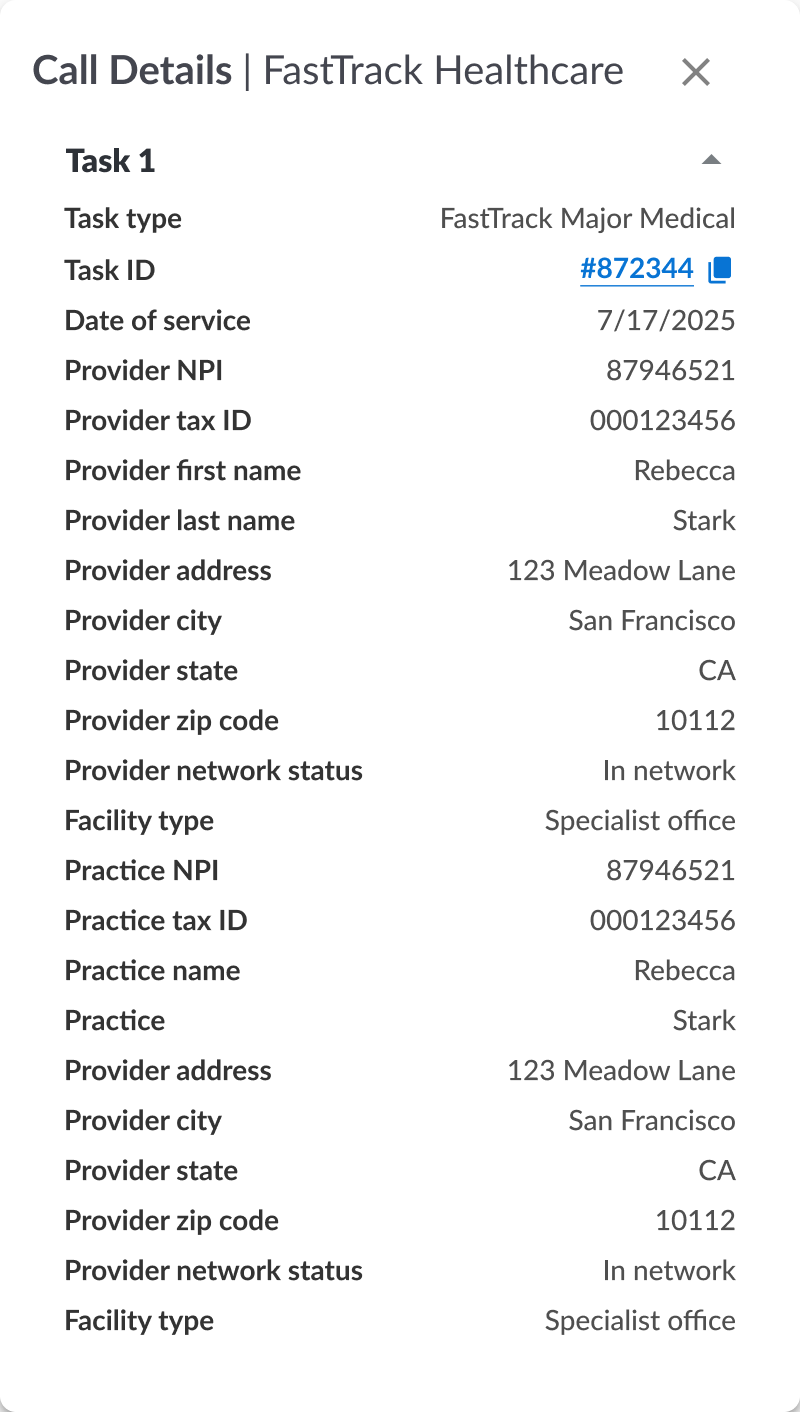
View call details
You can view more details about the tasks on each call by clicking the “View details” option in the call dropdown menu.
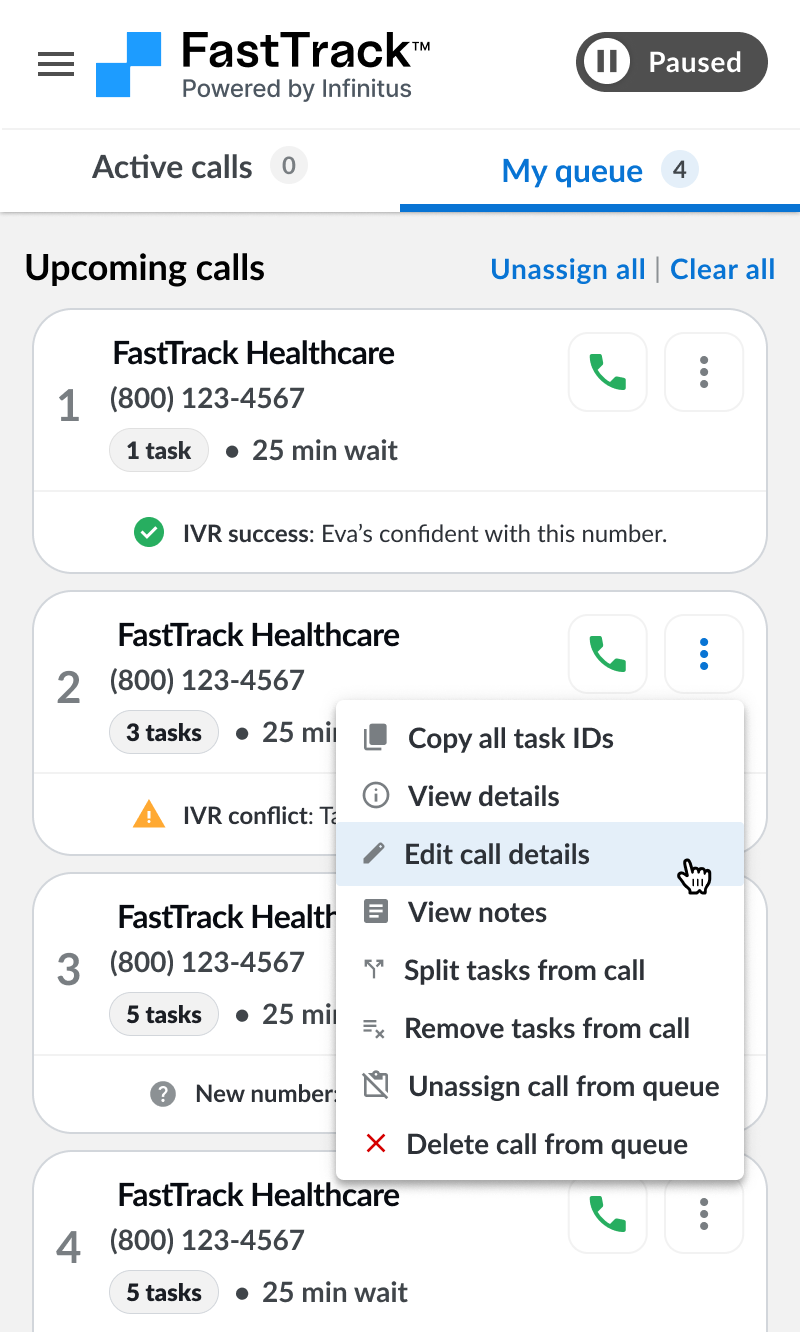
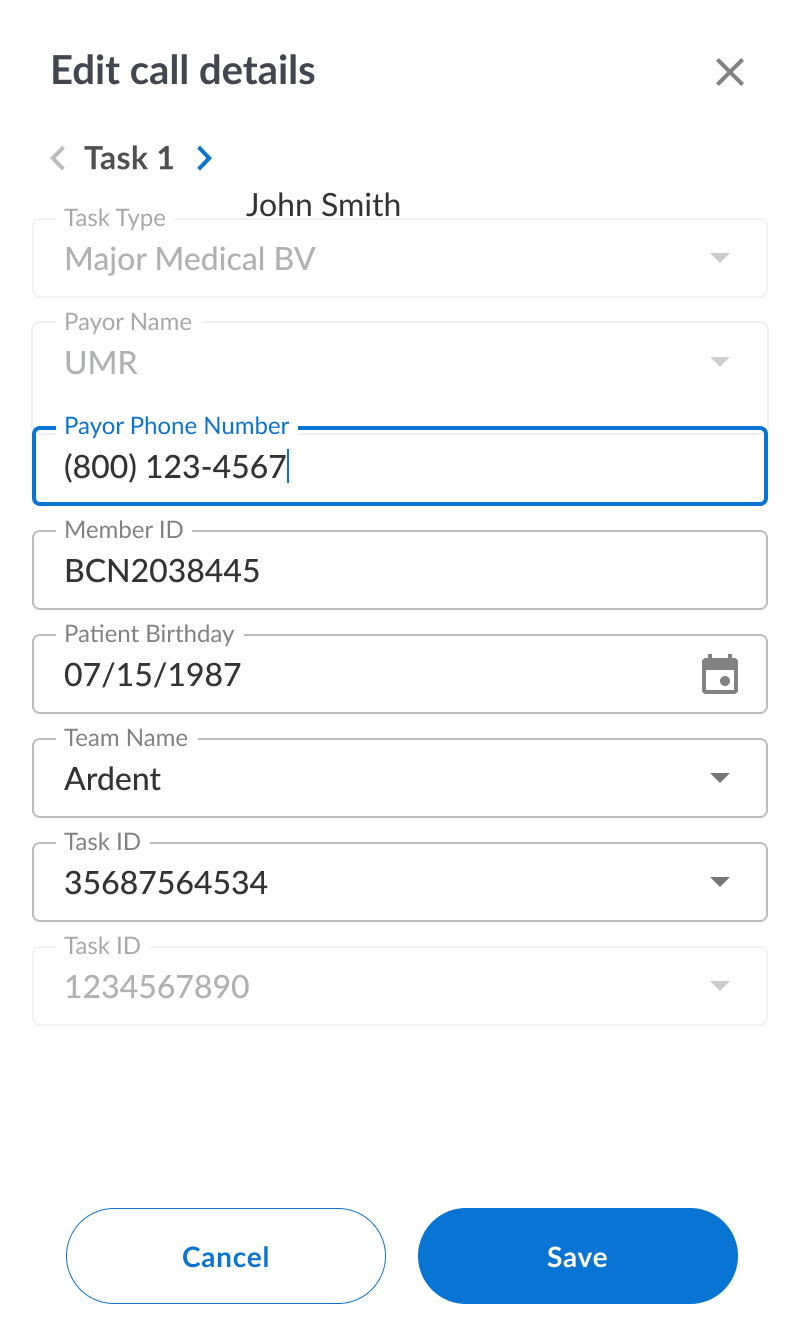
Edit call details
If you need to edit any details about the call (e.g. phone number) you can click the “Edit call details” option in the call dropdown menu.

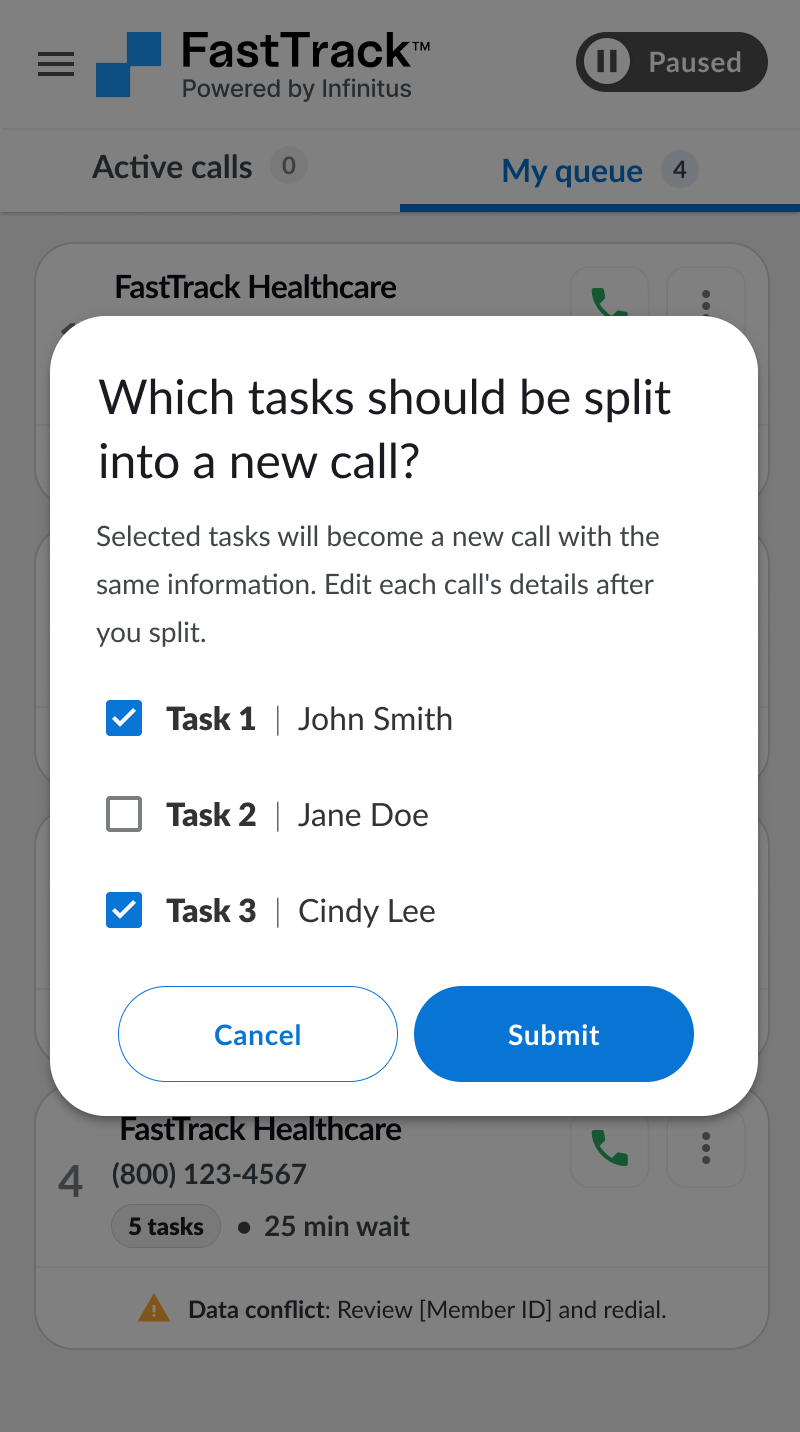
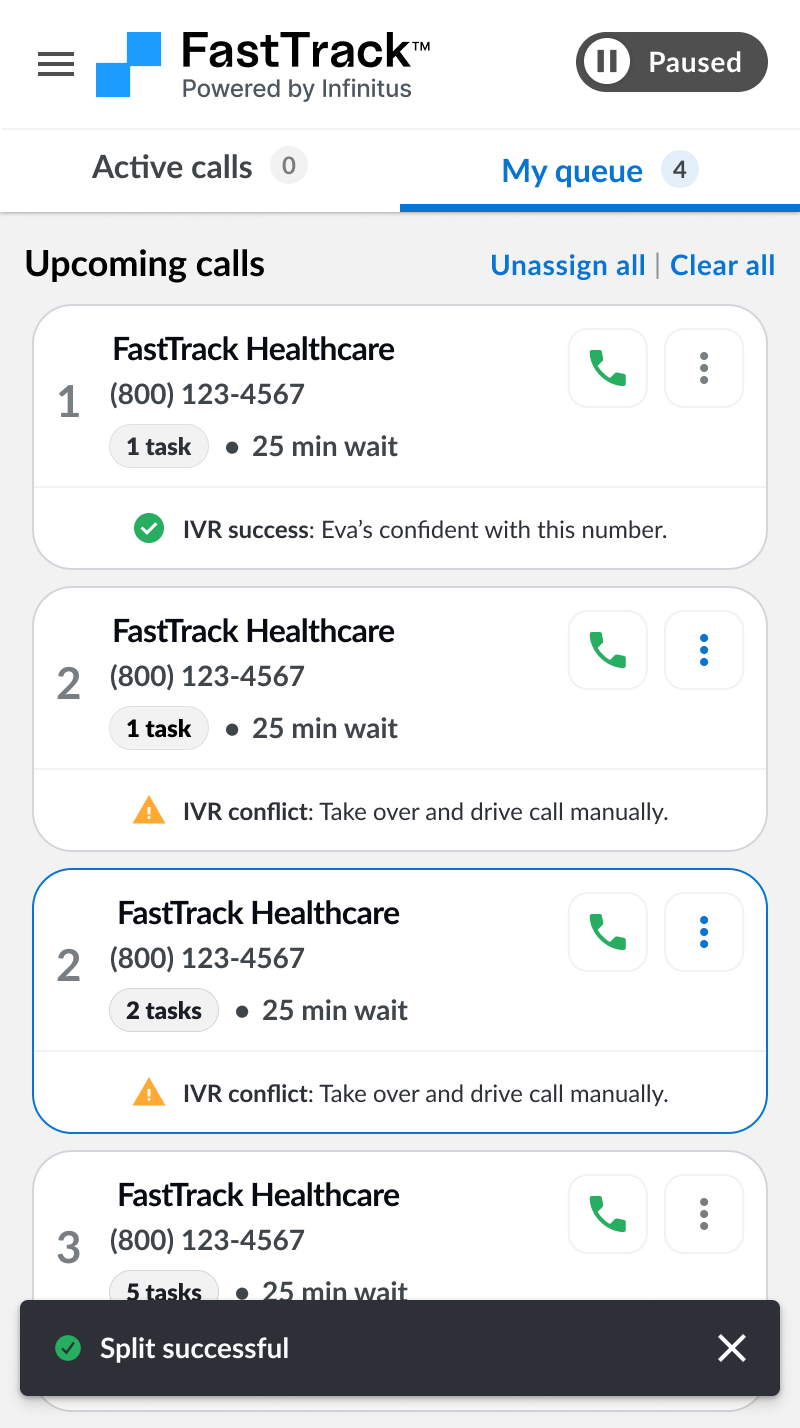
Split tasks from call
If you need to move 1 or more tasks on a call to a different call (this is useful if you need to change the phone number on some of the tasks) you can click the “Split tasks from call” option in the call dropdown menu. The tasks you select to split will get added to a new call in your queue.
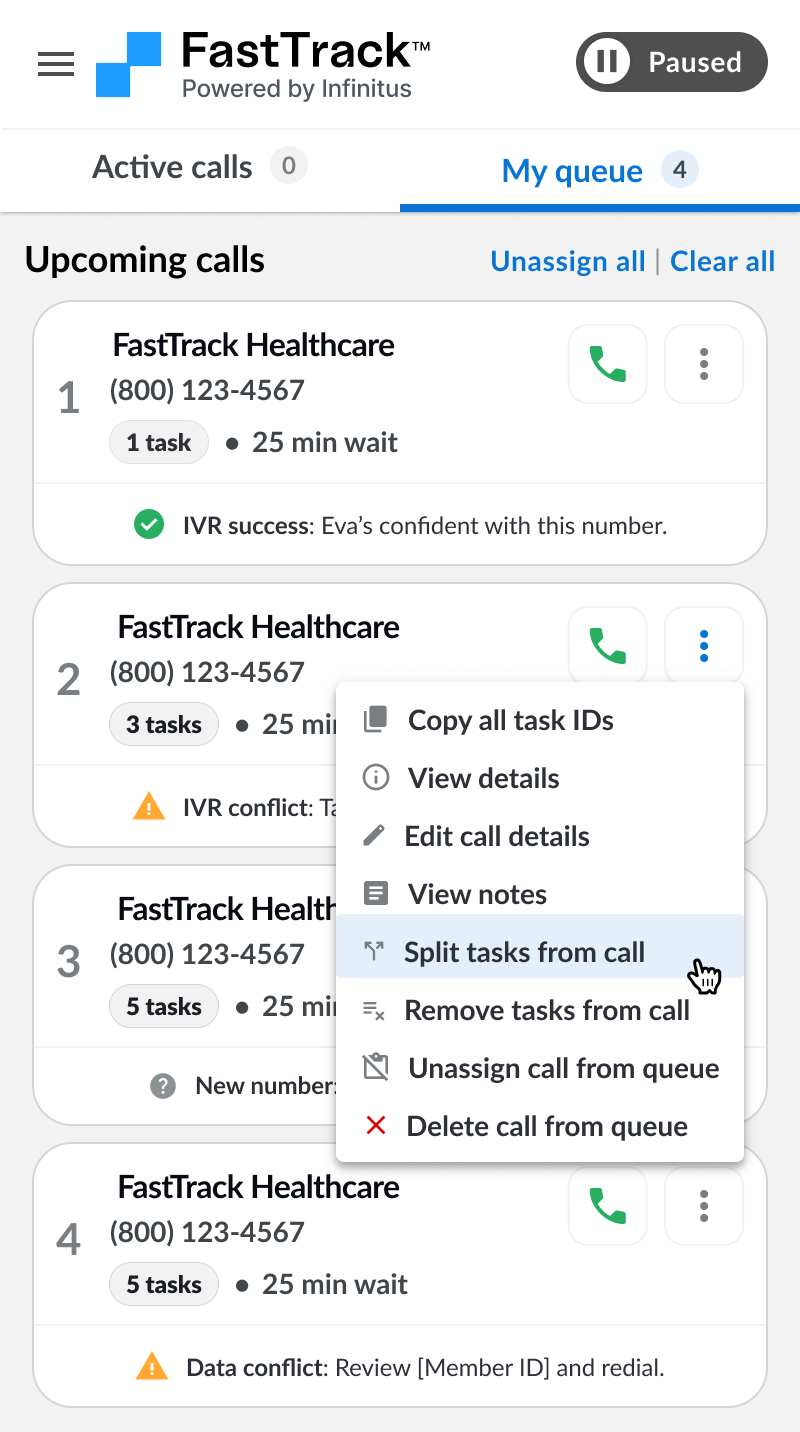
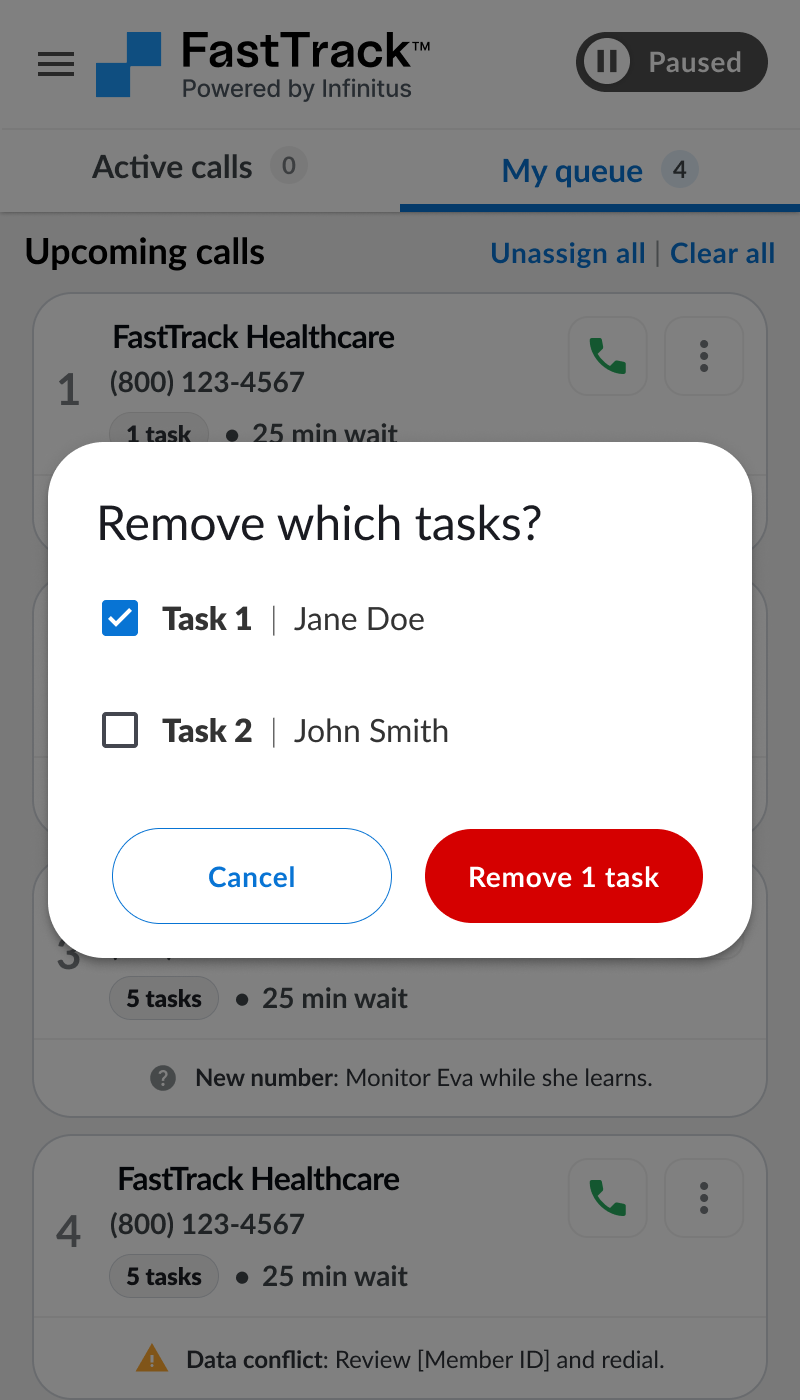
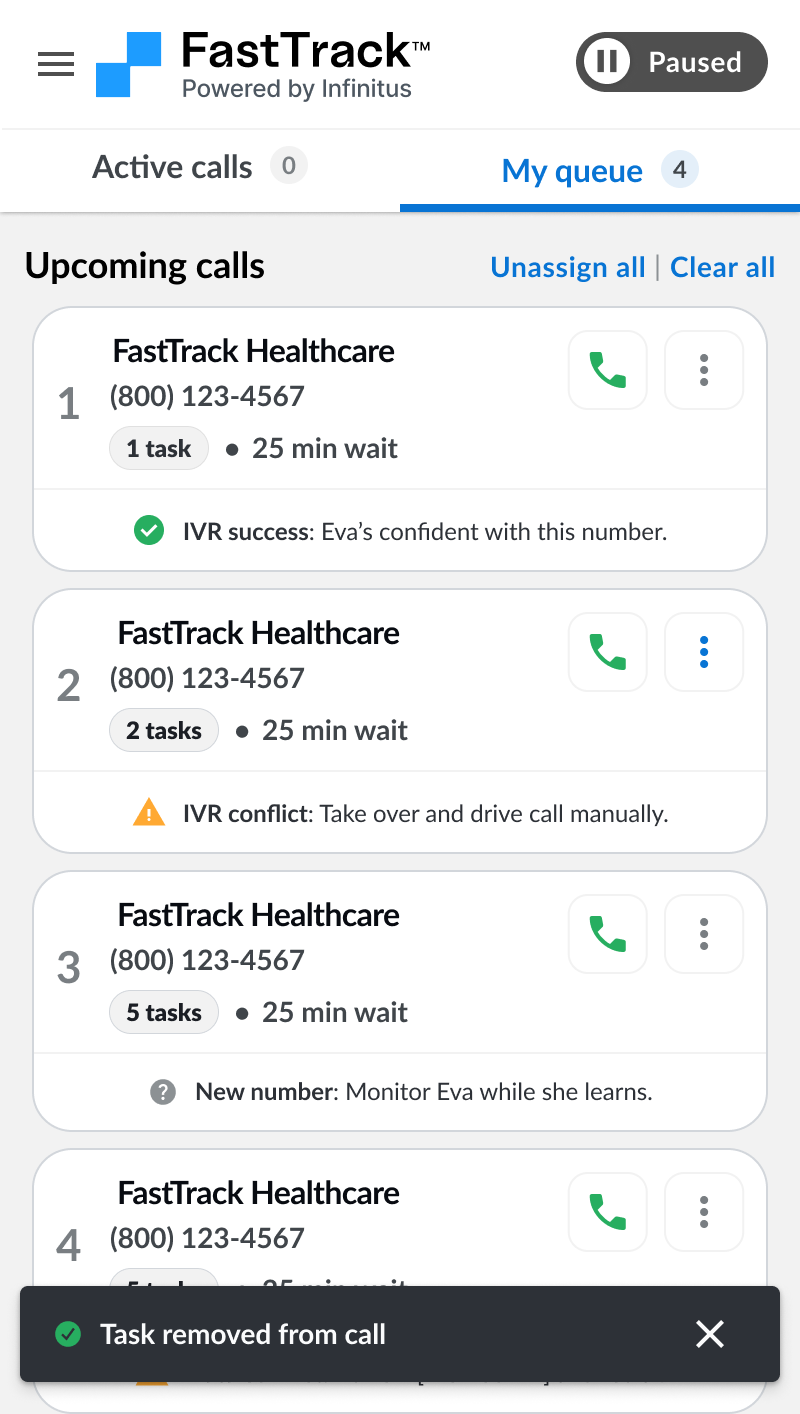
Remove tasks from call
If you need to remove tasks completely from a call you can click the “Remove tasks from call” option in the call dropdown menu and select the tasks to remove. The tasks selected will get removed entirely from your queue.
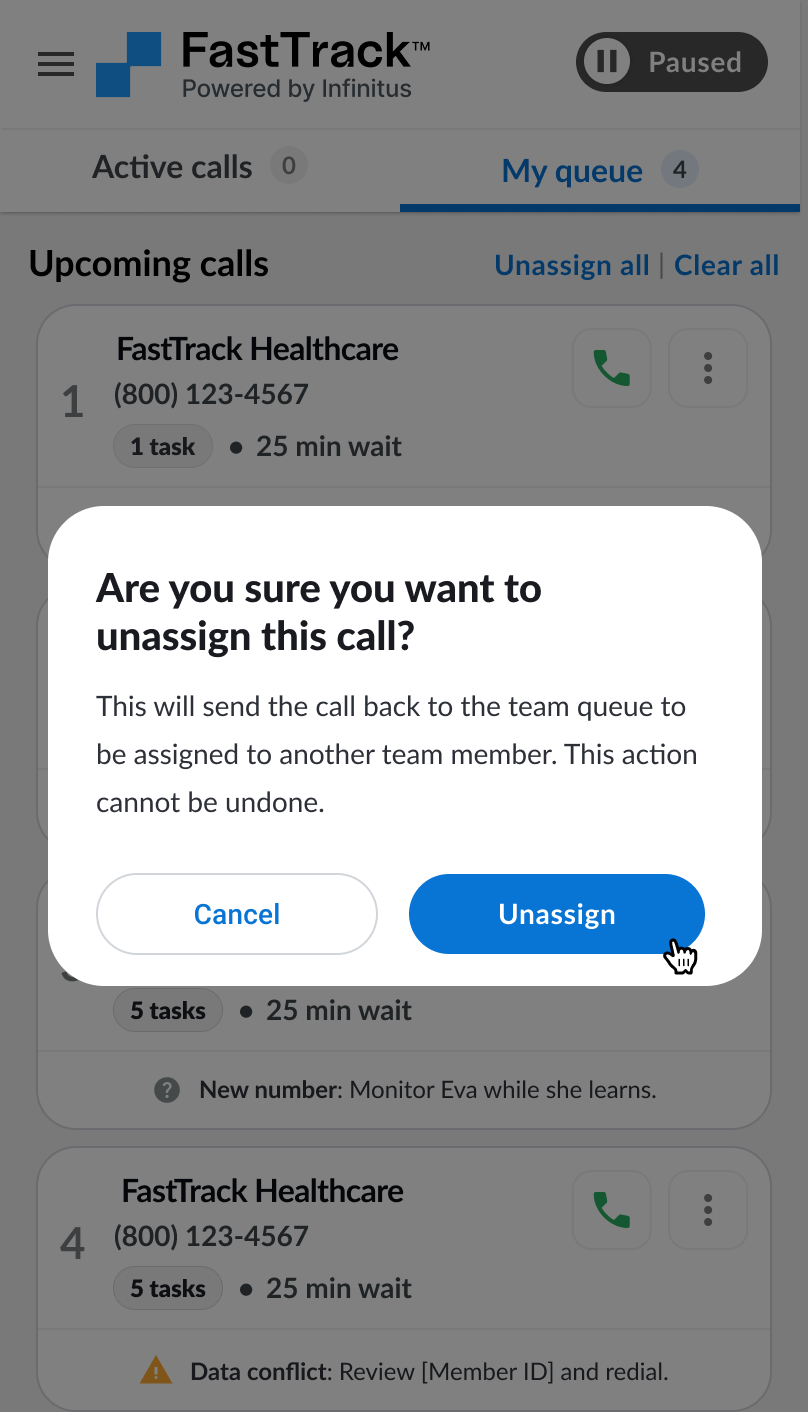
Un-assign calls
If you need to un-assign all of the calls in your queue (e.g. if you are going on break or finished for the day) you can click the “Unassign all” button and this will unassign (but not remove) all of the calls in your queue and add back to the team queue to be worked by someone else.

Starting calls from your queue
When you are ready to start a call you can click the green phone button on the call in “My queue” and Eva will start navigating IVR+Hold in the background for you on that call.
Start your first call when ready
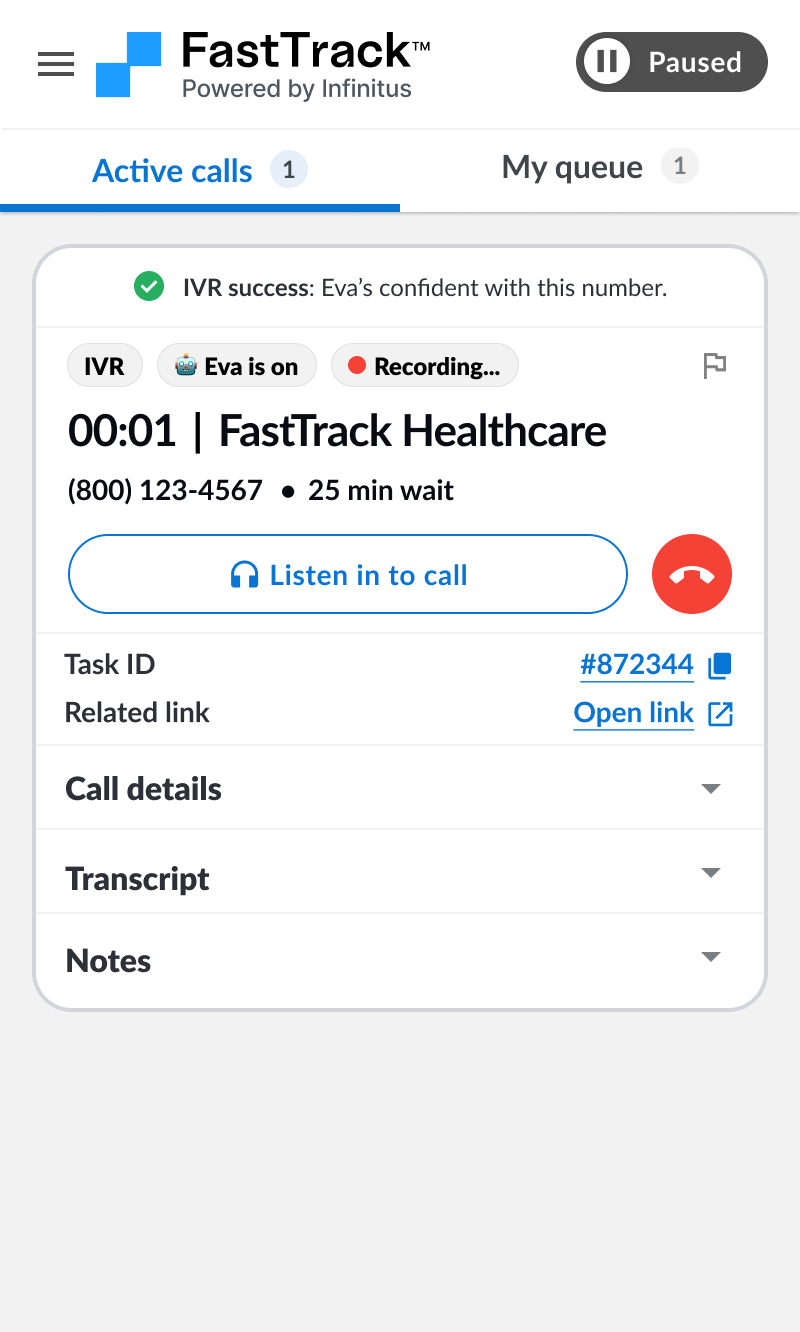
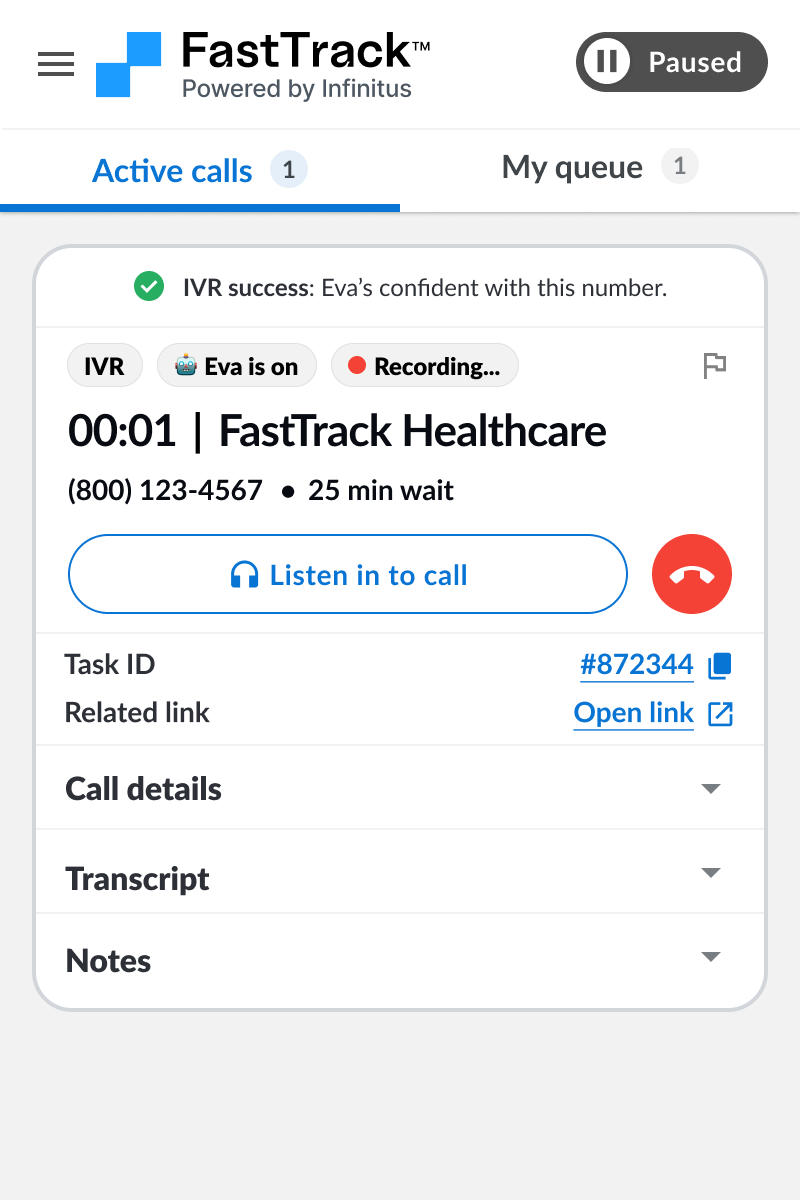
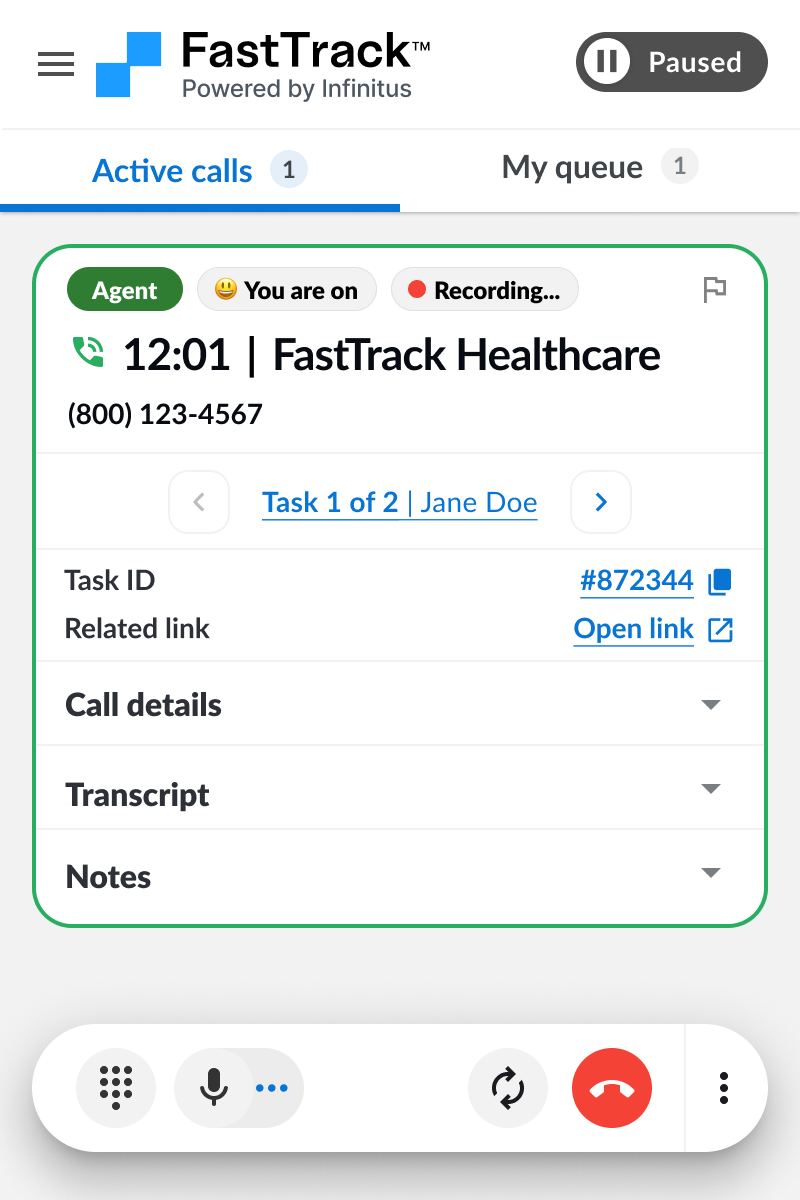
Active calls
Once a call has started it will appear in your “Active calls” tab. You will have everything you need to manage the call on the call card
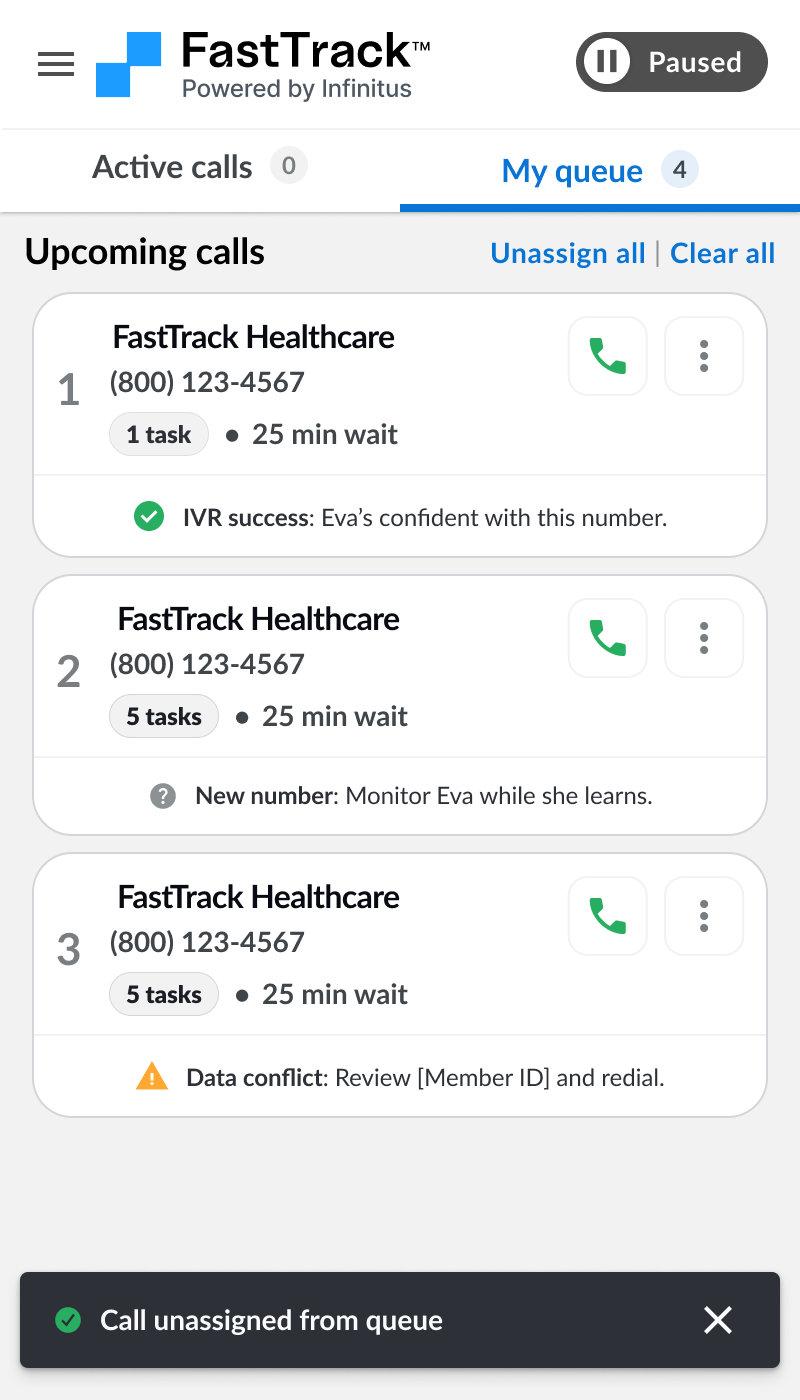
Payor Insights
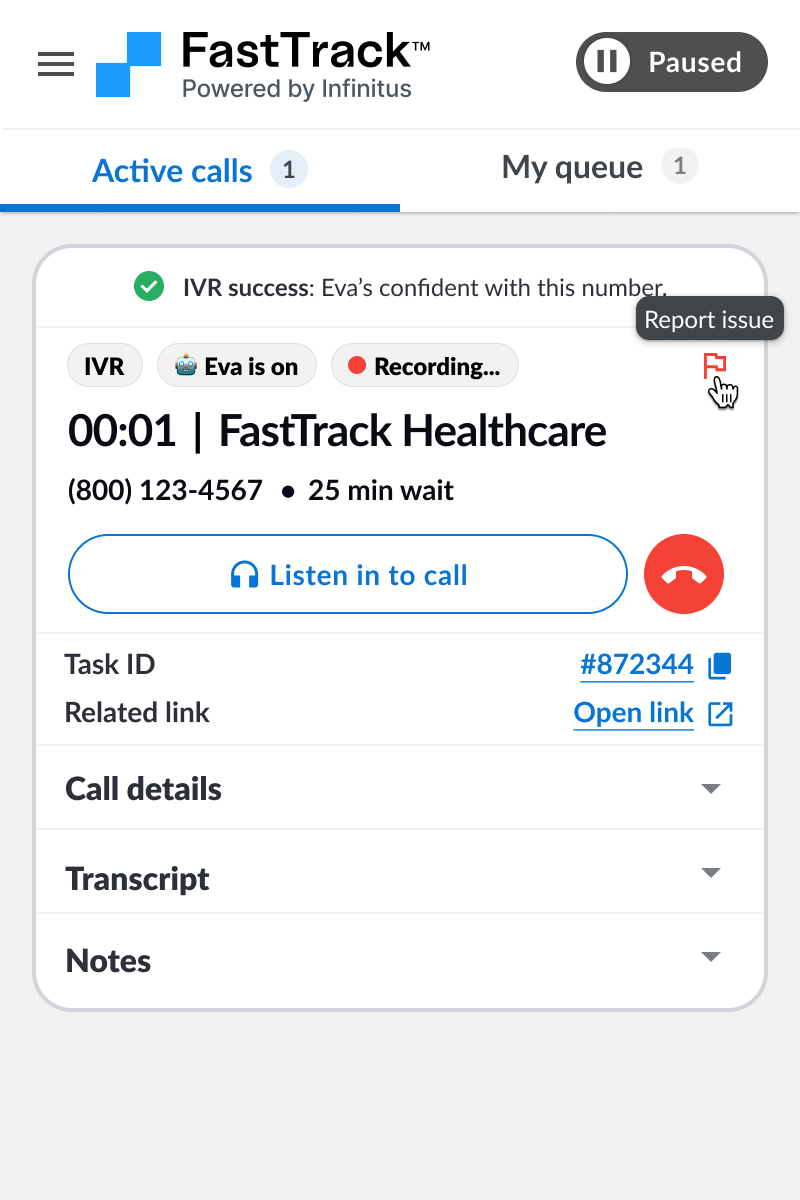
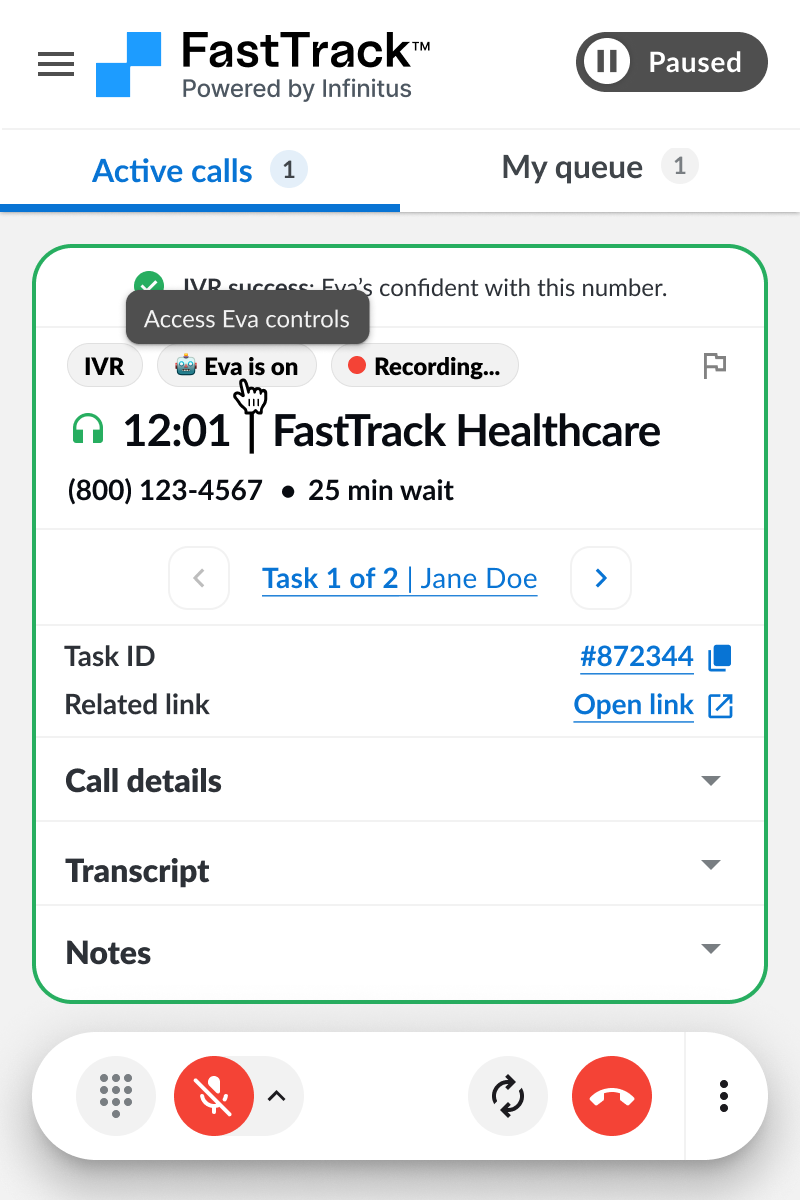
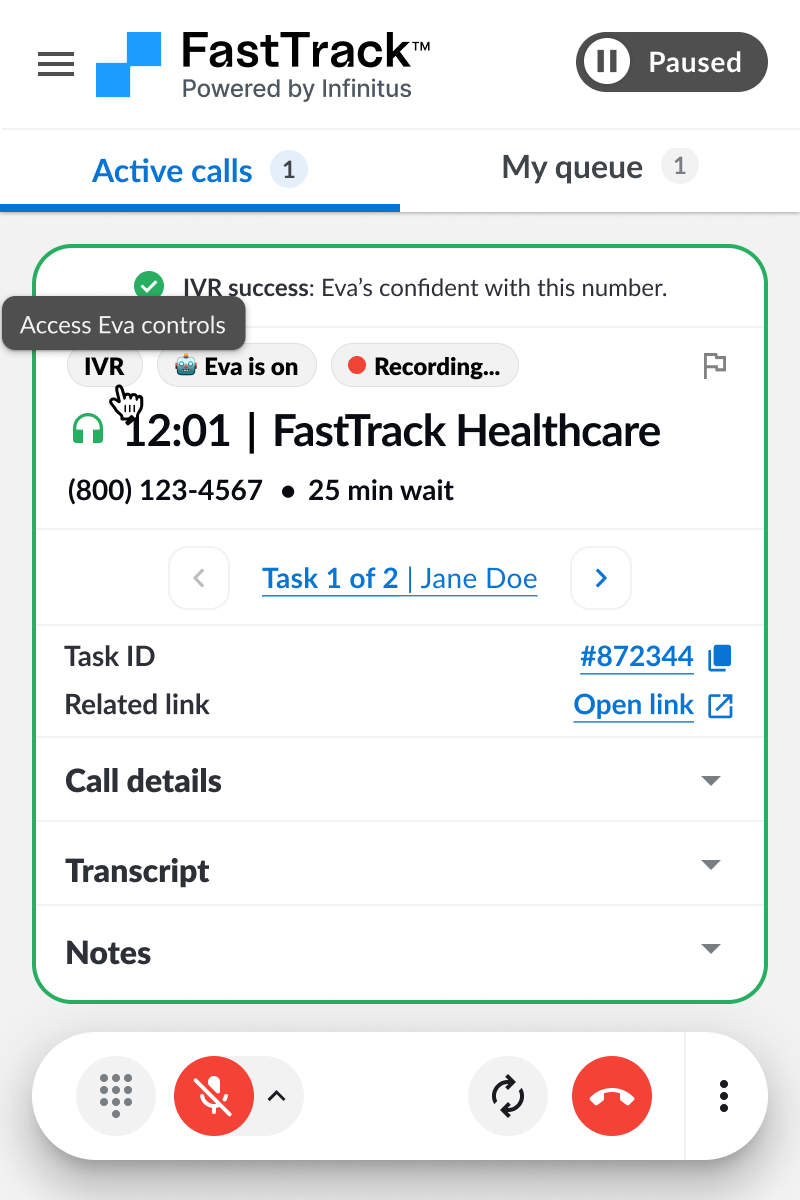
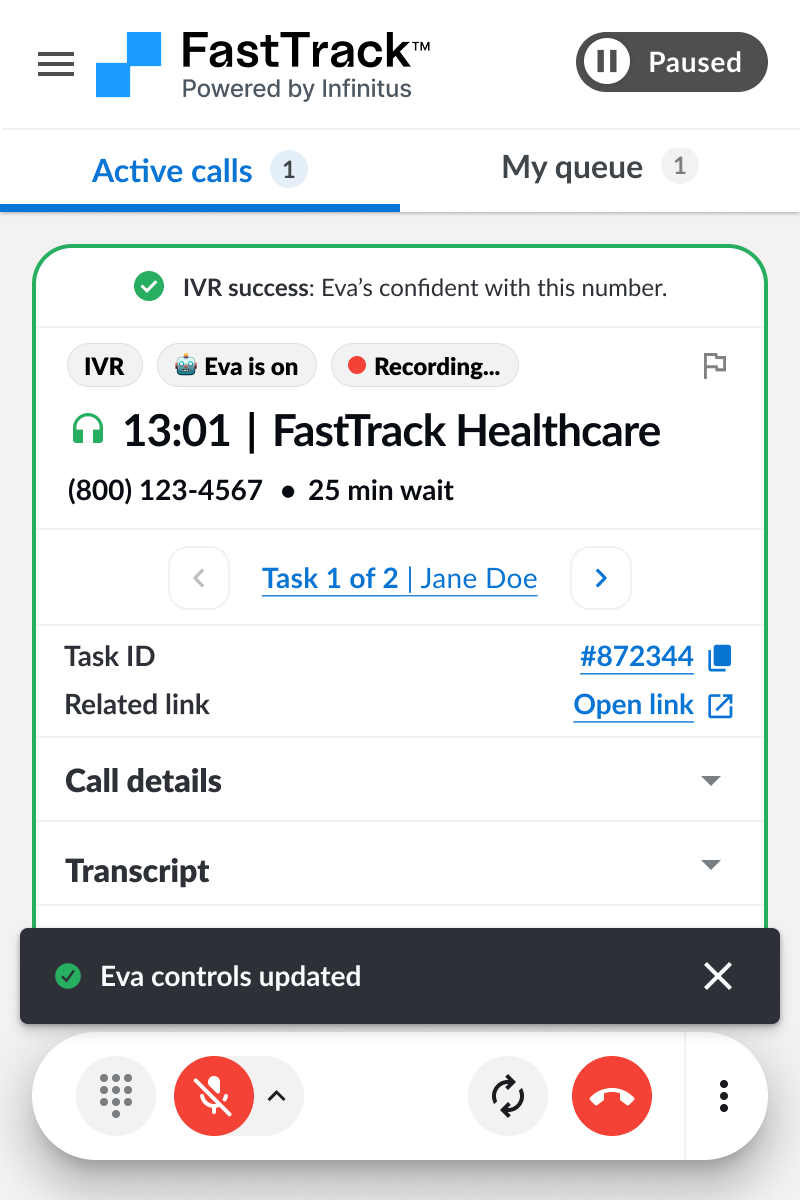
IVR Confidence
See which phone numbers Eva navigates successfully and when she'll need your help. Make informed decisions about letting Eva drive or taking over from the start.
Know when Eva's got it, and when she needs help.
IVR Confidence shows Eva's track record with each phone number before you dial, so you can decide whether to let her navigate or take control from the start. Surfaced in both the My Queue and Active call screens so you’re making the right decision every time.
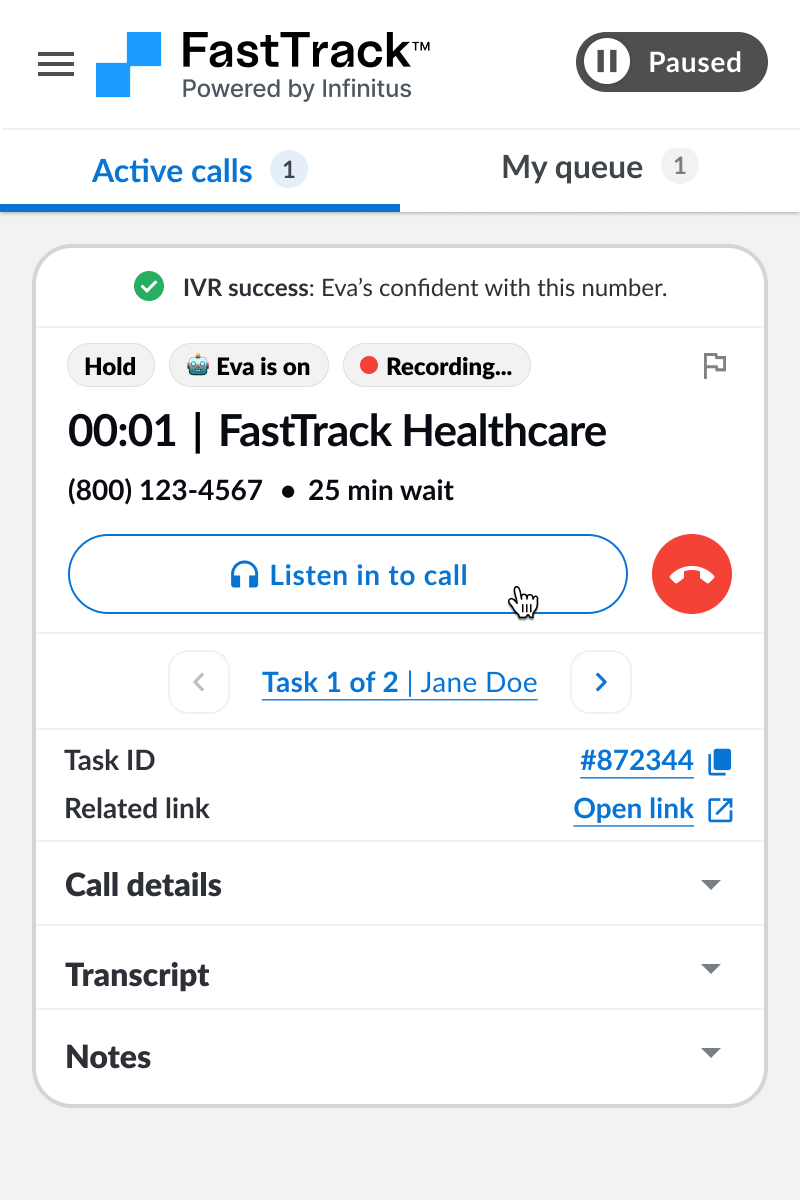
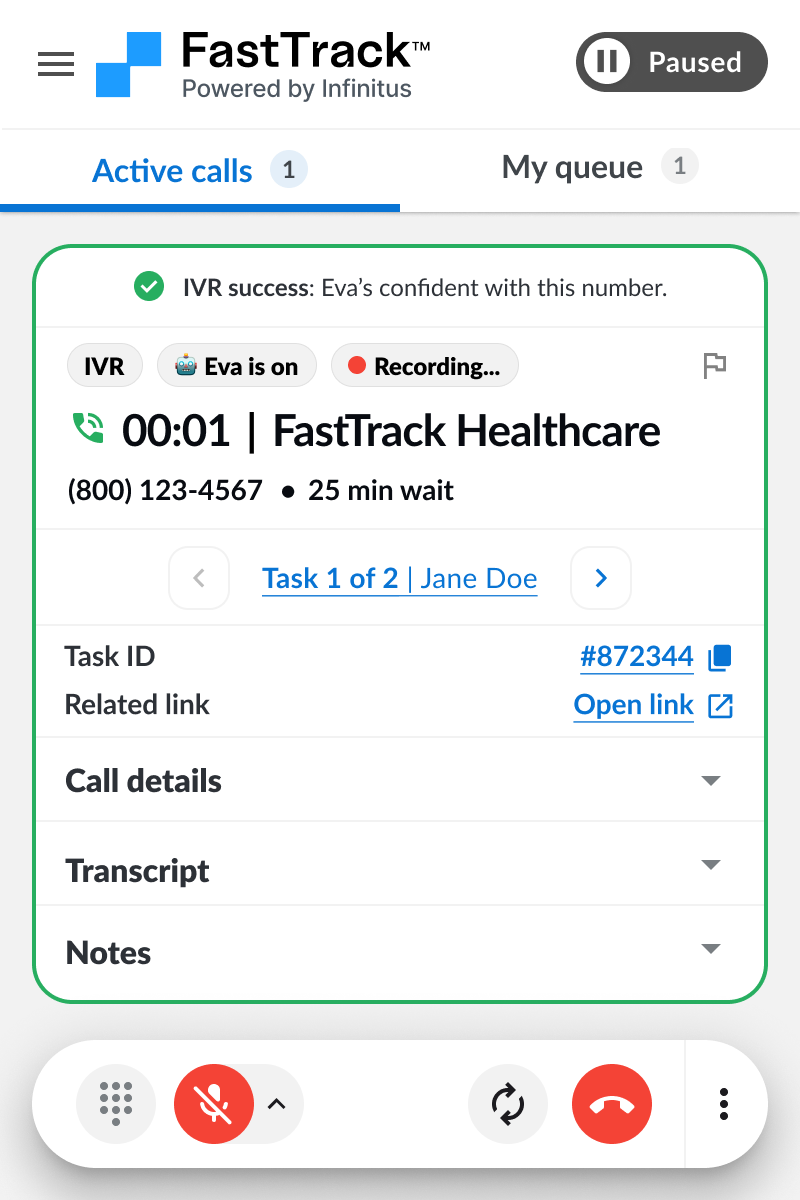
IVR Success (High confidence):
Eva is confident navigating this payor’s IVR. She can reach an agent without help.
For “IVR success” you will not be able to take over the call for the first 7 min.
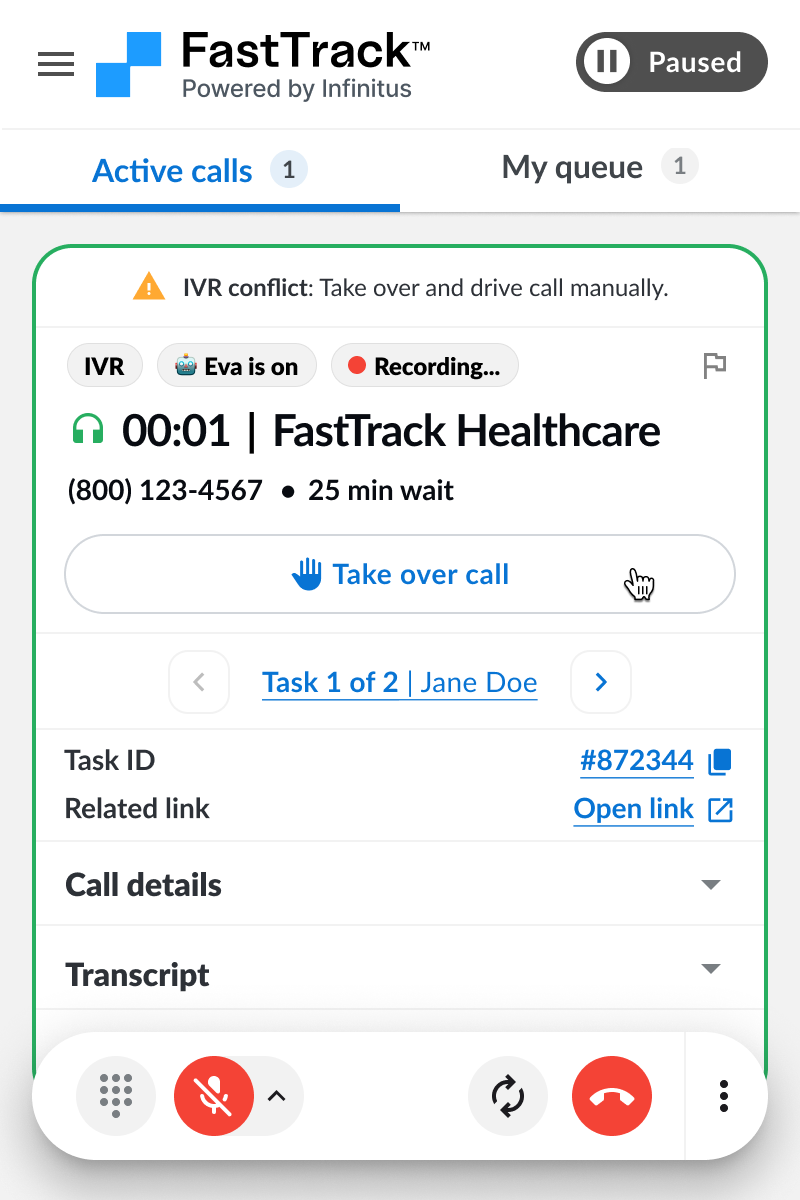
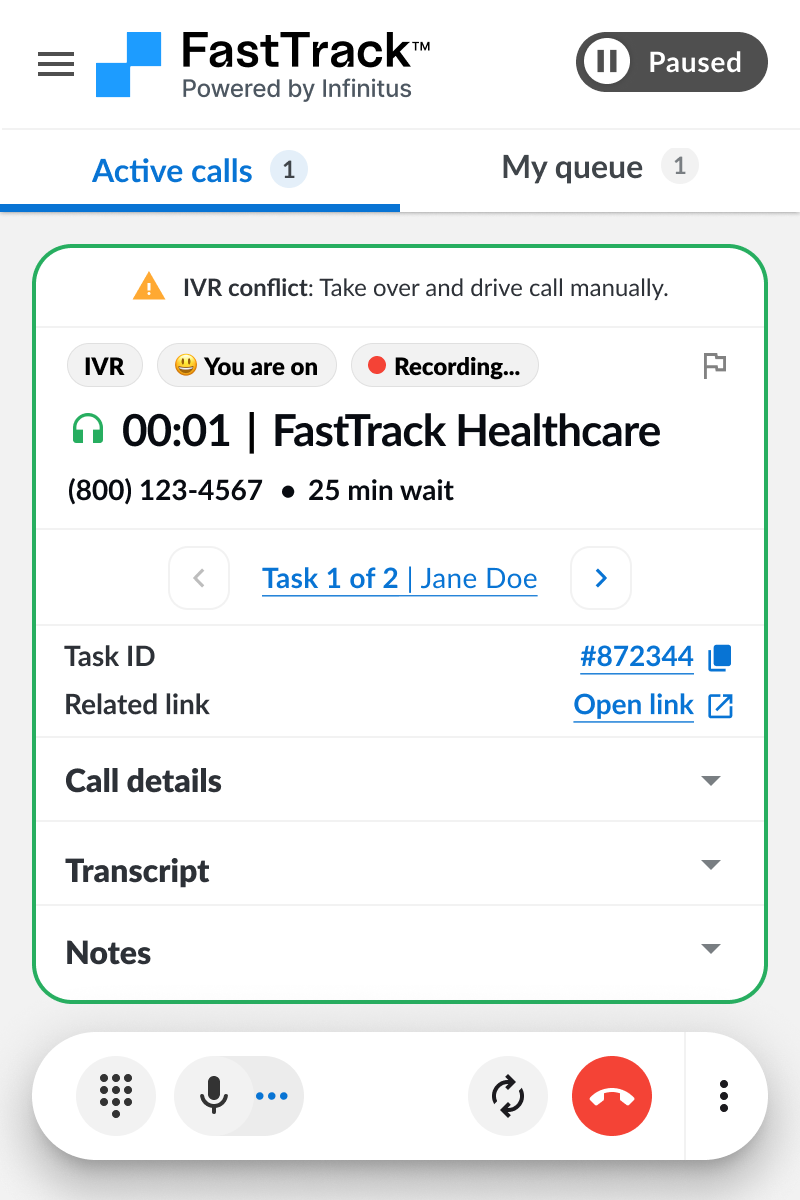
IVR Conflict (Low confidence):
Eva has had a hard time navigating this payor’s IVR. She needs help to reach an agent.

For “IVR conflict” you should take over the call immediately and drive manually.
New Number (Not enough data):
This is the first time Eva is calling this number. She may need help to reach an agent.
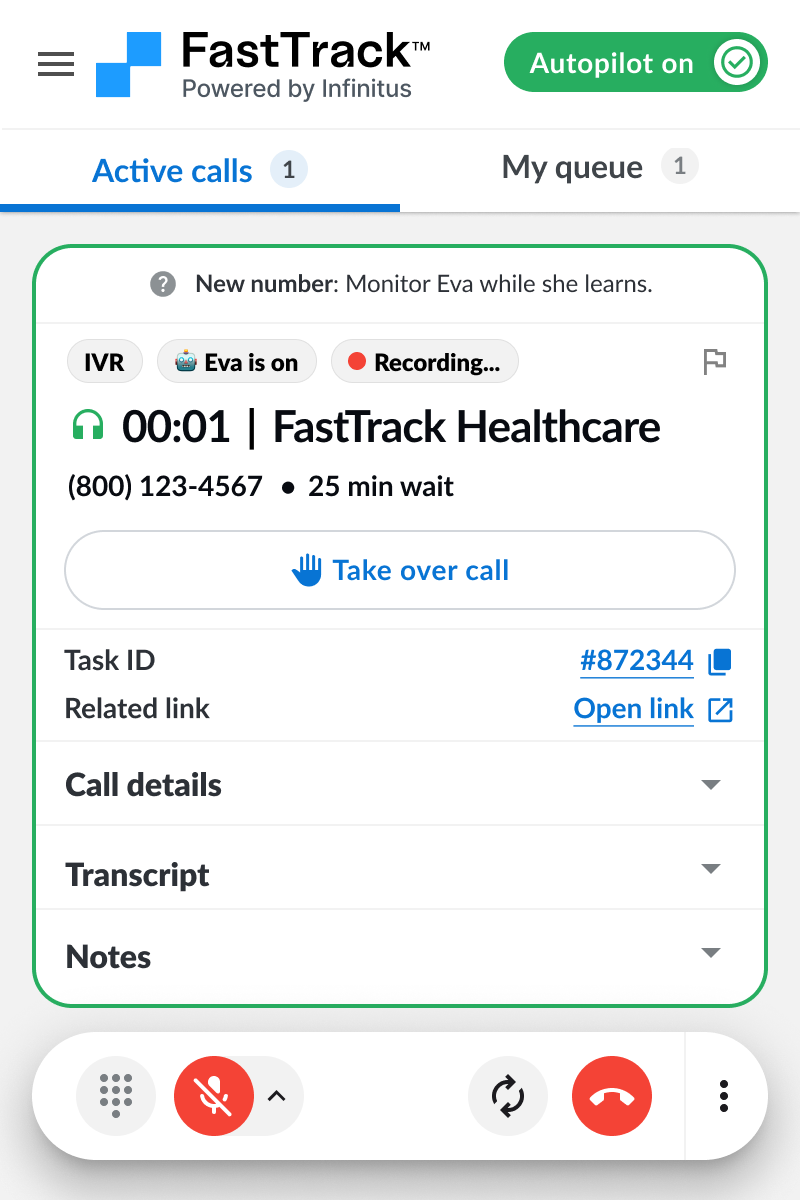
For “New number” you should monitor Eva and take over if she is having trouble.
Listening in to the call
When a call starts, Eva will start driving automatically. You can click the “Listen in to call” button to connect your audio to listen in. Eva will still be driving and your mic will be muted. If Eva is driving you cannot speak, you will need to first take over the call if you want to speak.

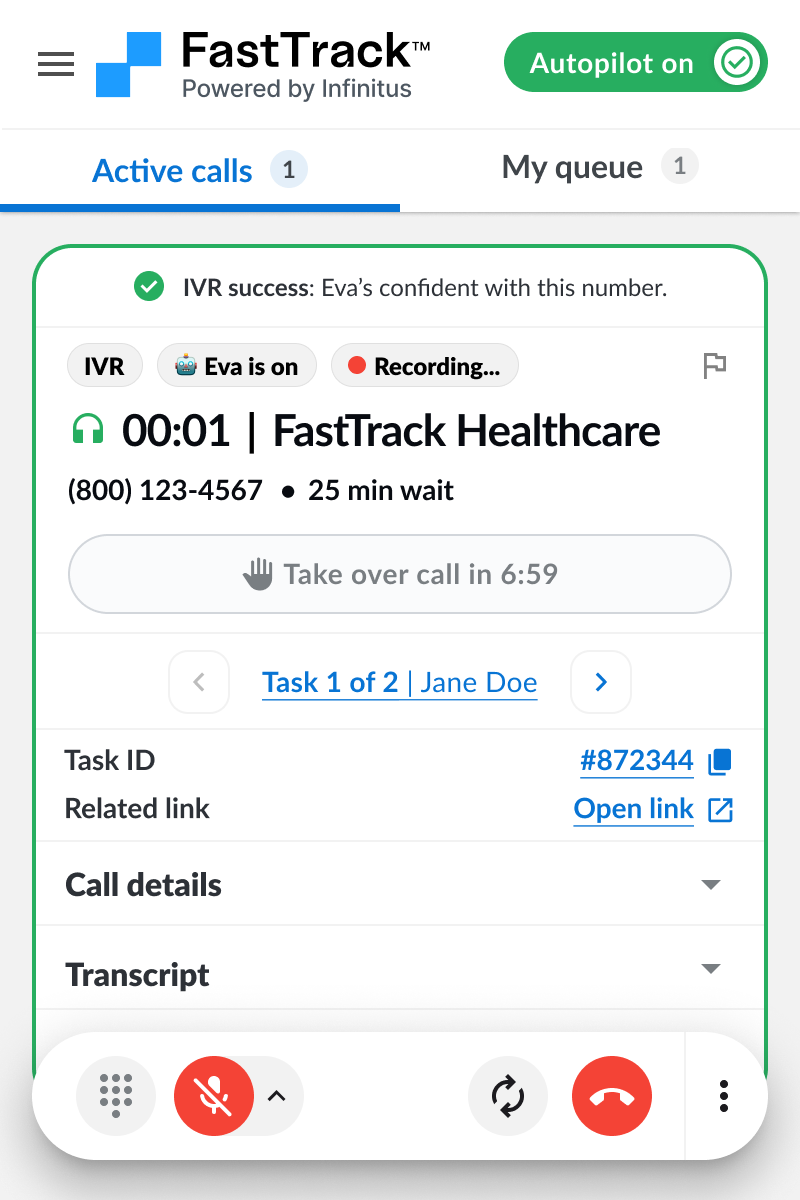
Call controls bar
The call controls bar has everything you need to manage a call from start to finish.
Eva is on
When Eva is on you will be muted by default and unable to use the keypad.
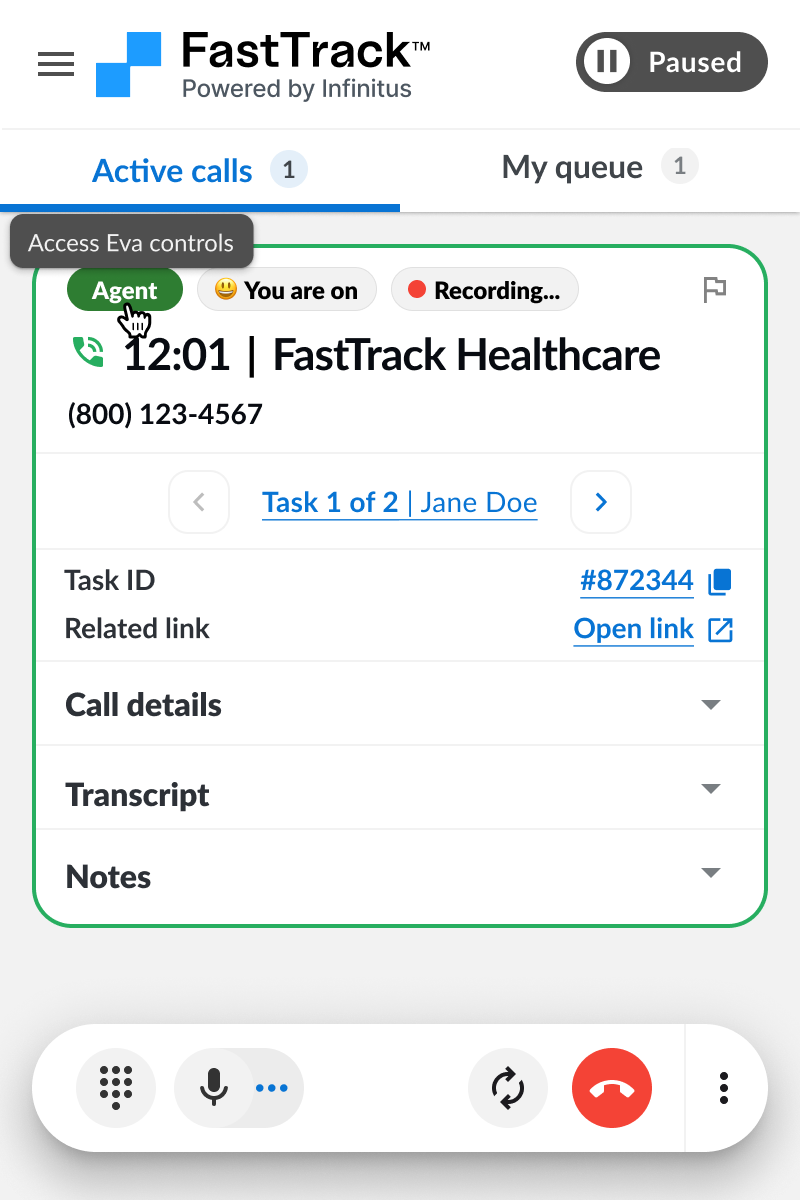
You are on
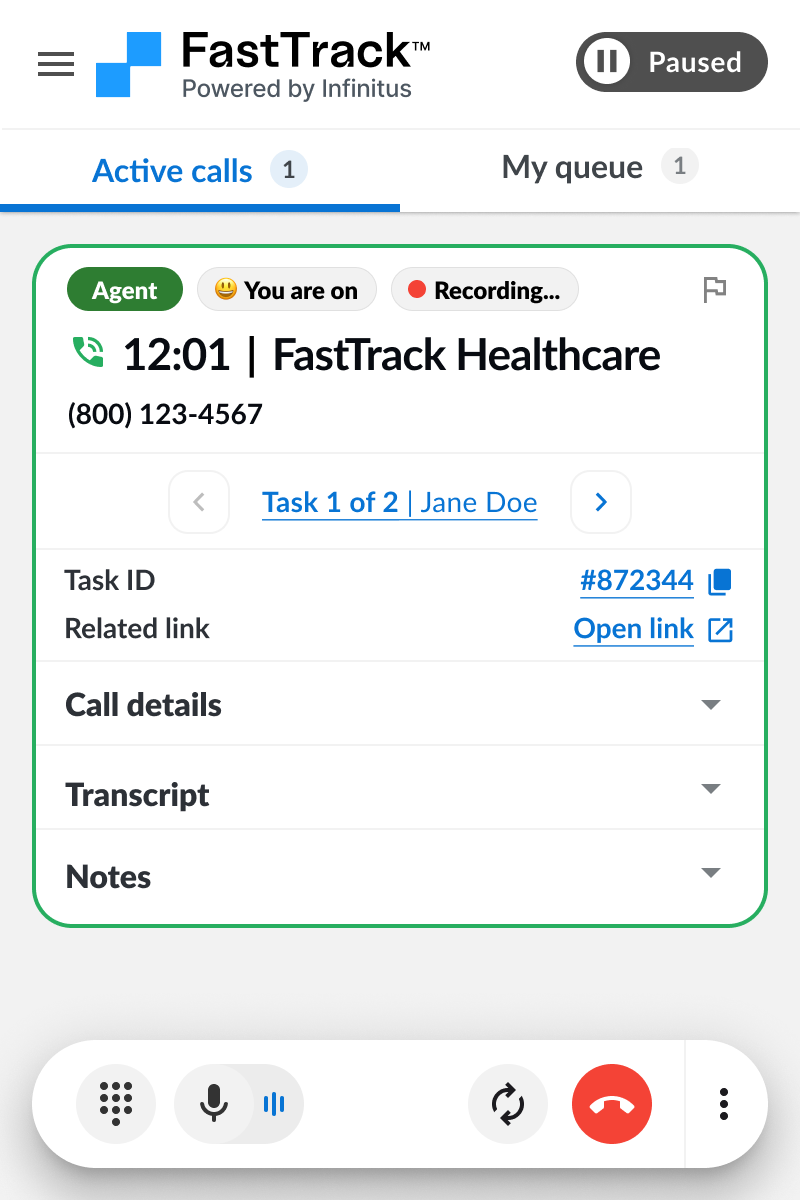
When you are driving the call you will be able to use the keypad and mute/unmute.
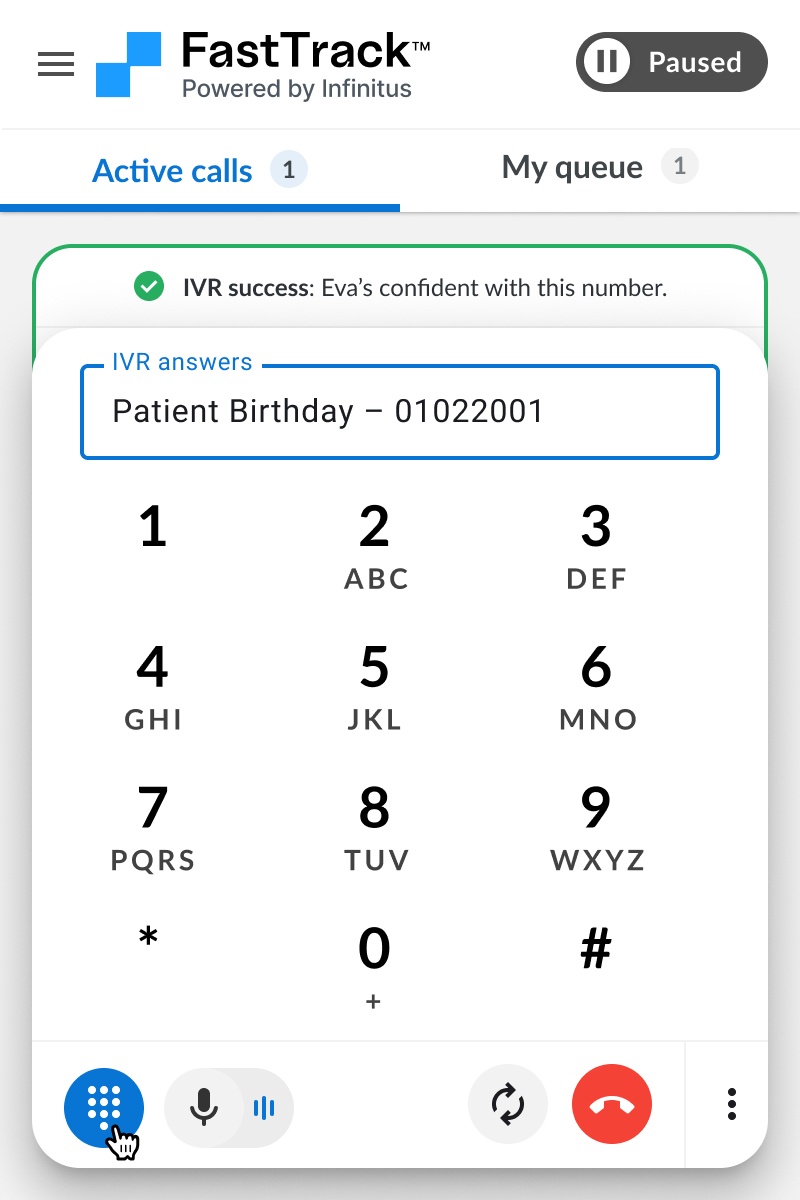
Keypad
The keypad can be used to manually drive IVRs when needed.
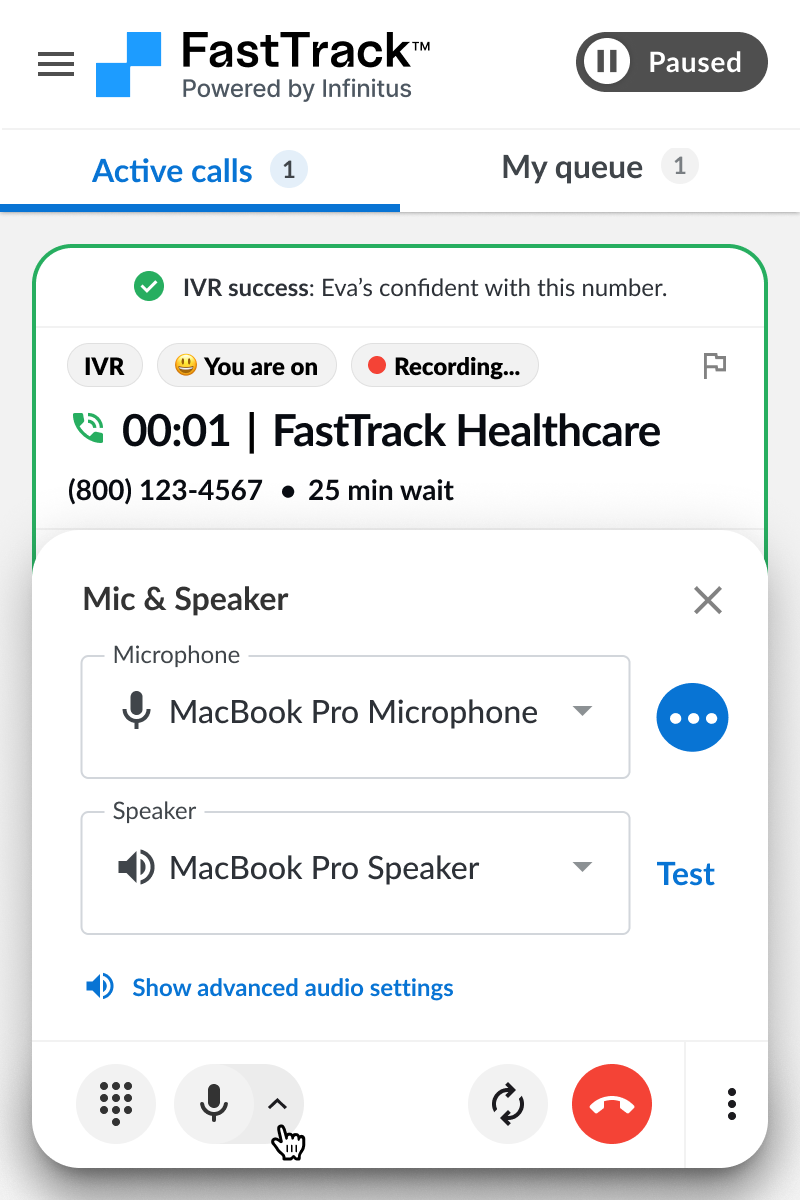
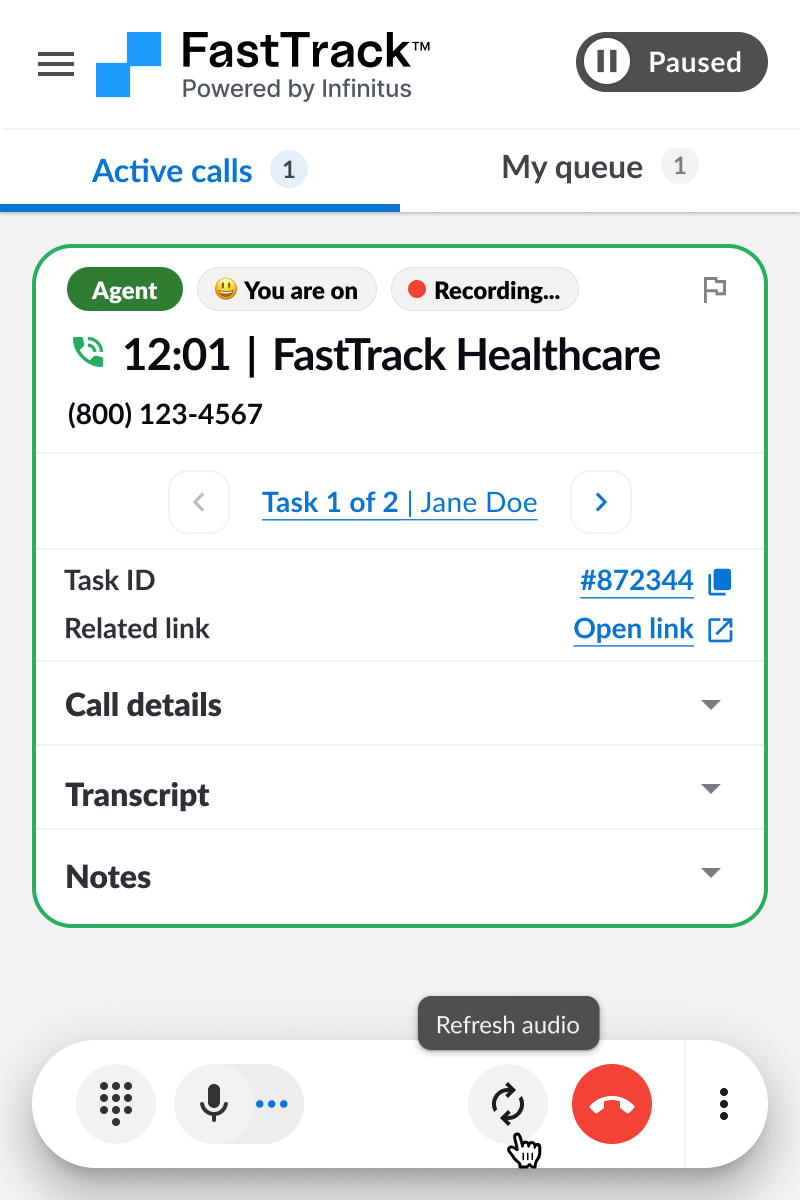
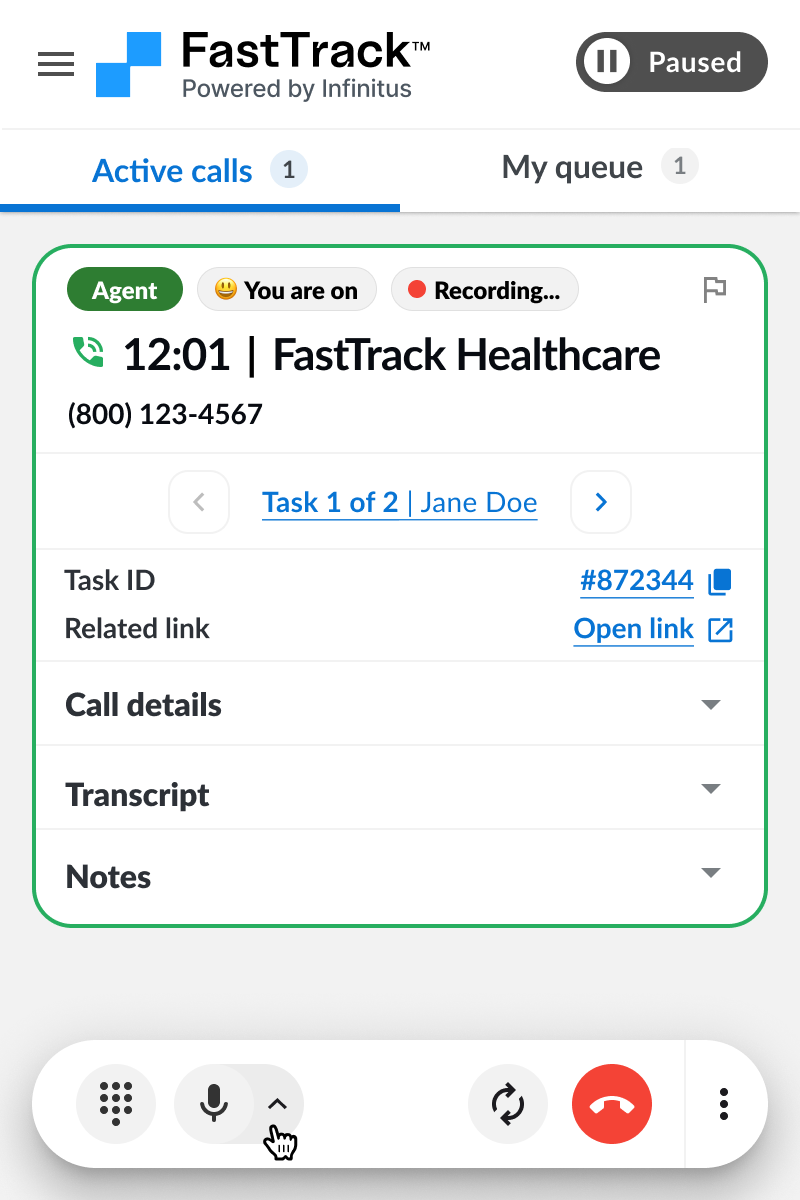
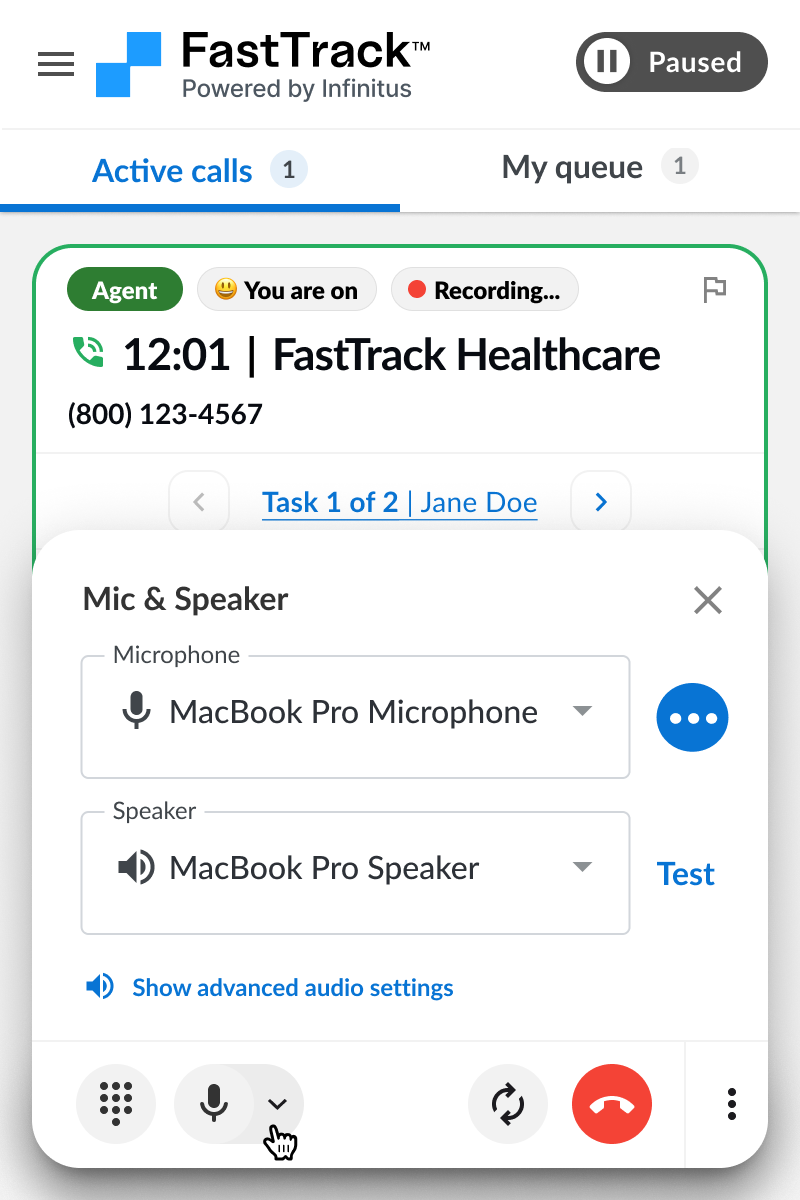
Audio controls
The audio controls lets you check your microphone and speaker settings.
Take over the call
If you need to take over the call from Eva during IVR you can click the “Take over call” button. Eva will be disabled and your mic will be unmuted. You can now drive the IVR yourself. Note: for high confidence IVRs you will need to wait for 7 min before taking over.
Reaching an agent
Once Eva gets through IVR she will wait on hold and notify you when a payer agent is reached. You will be automatically unmuted when a payer agent joins the call and Eva will be disabled.
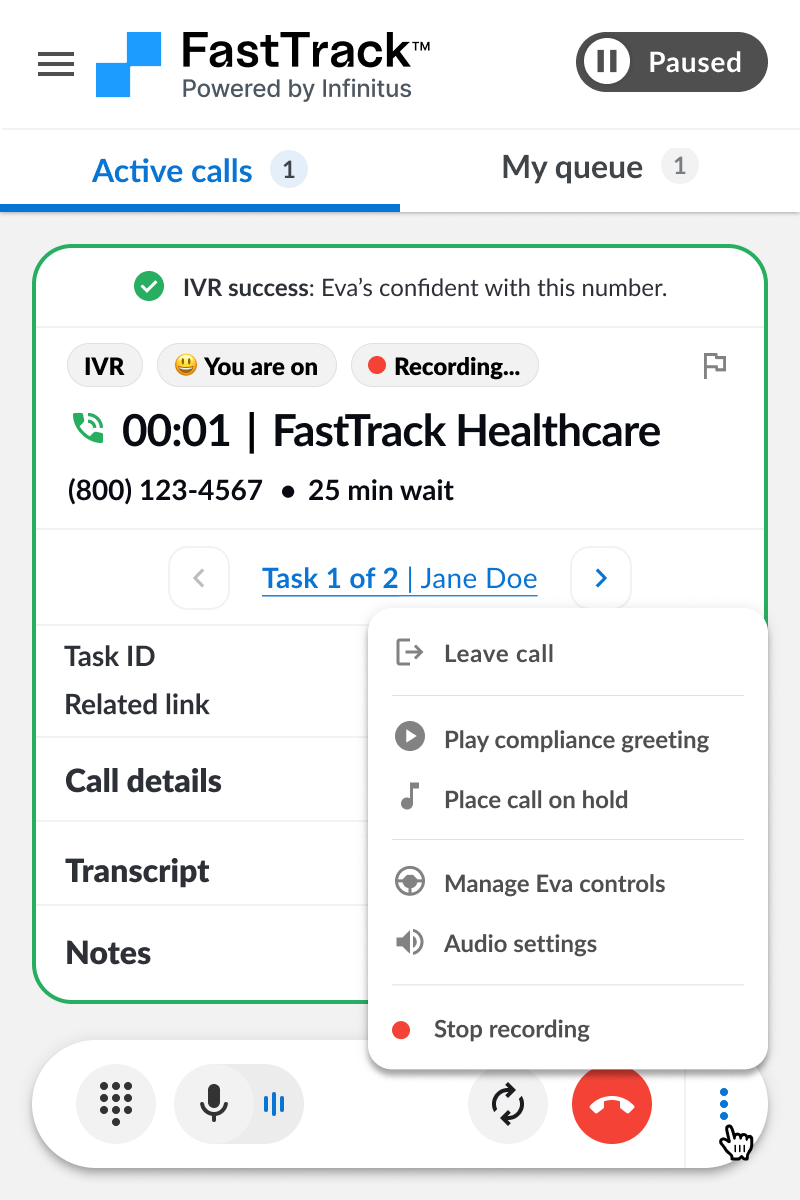
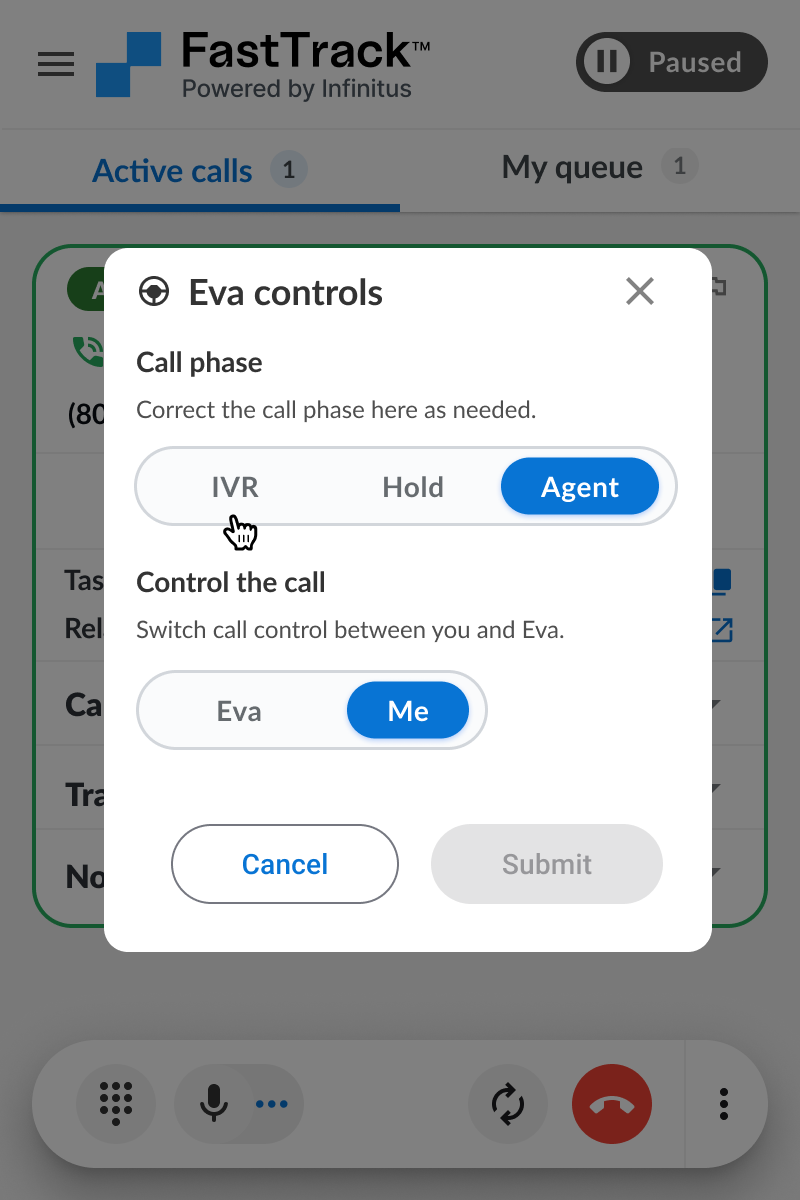
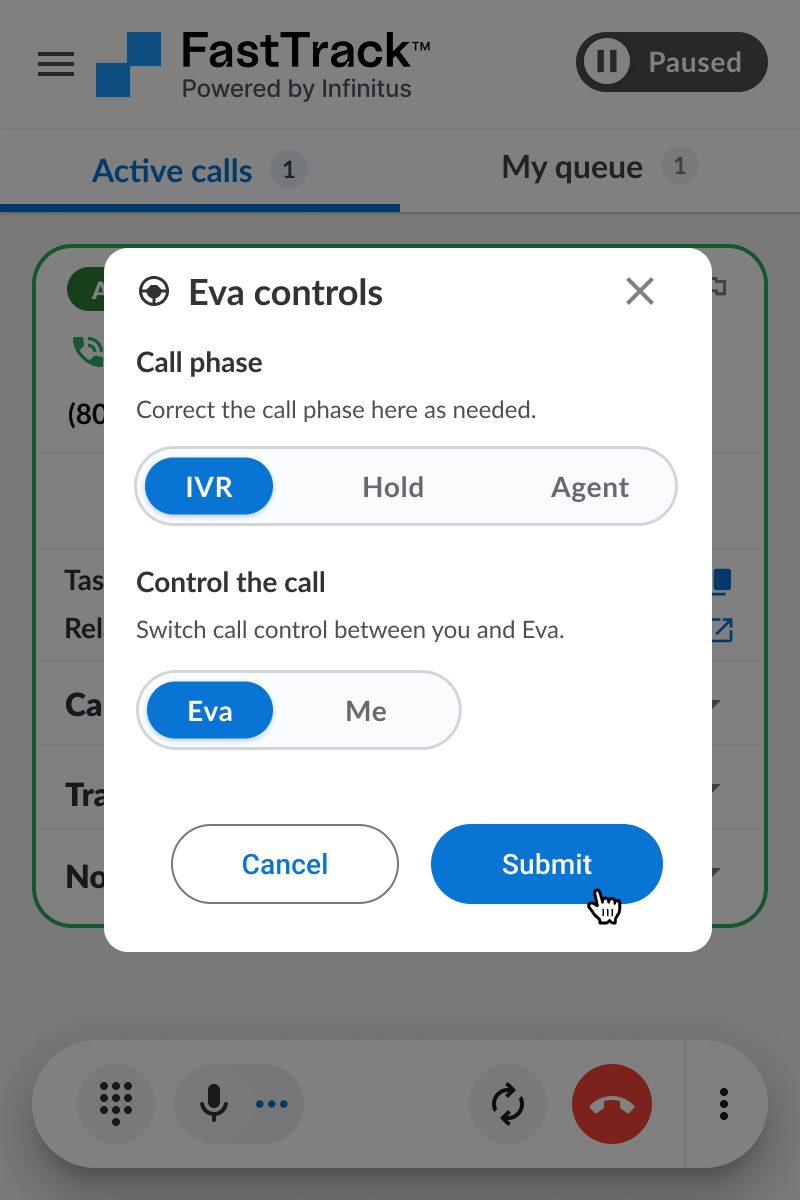
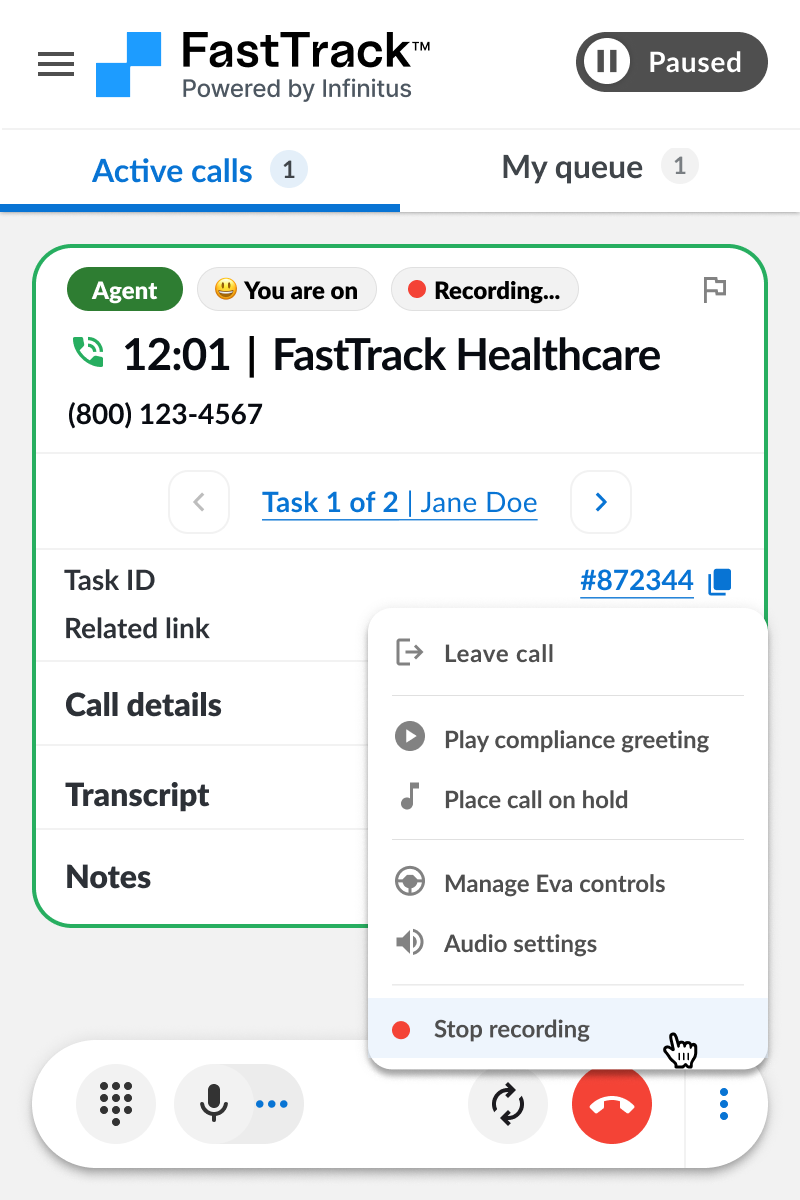
Eva controls
If you need to change the call phase at any time during the call (e.g. send a call back to IVR or hold) or change who is driving the call you can open the “Eva controls” popup and make the appropriate changes to the call. Eva controls can be accessed by clicking on the call phase or call control chips or by opening from the call menu.
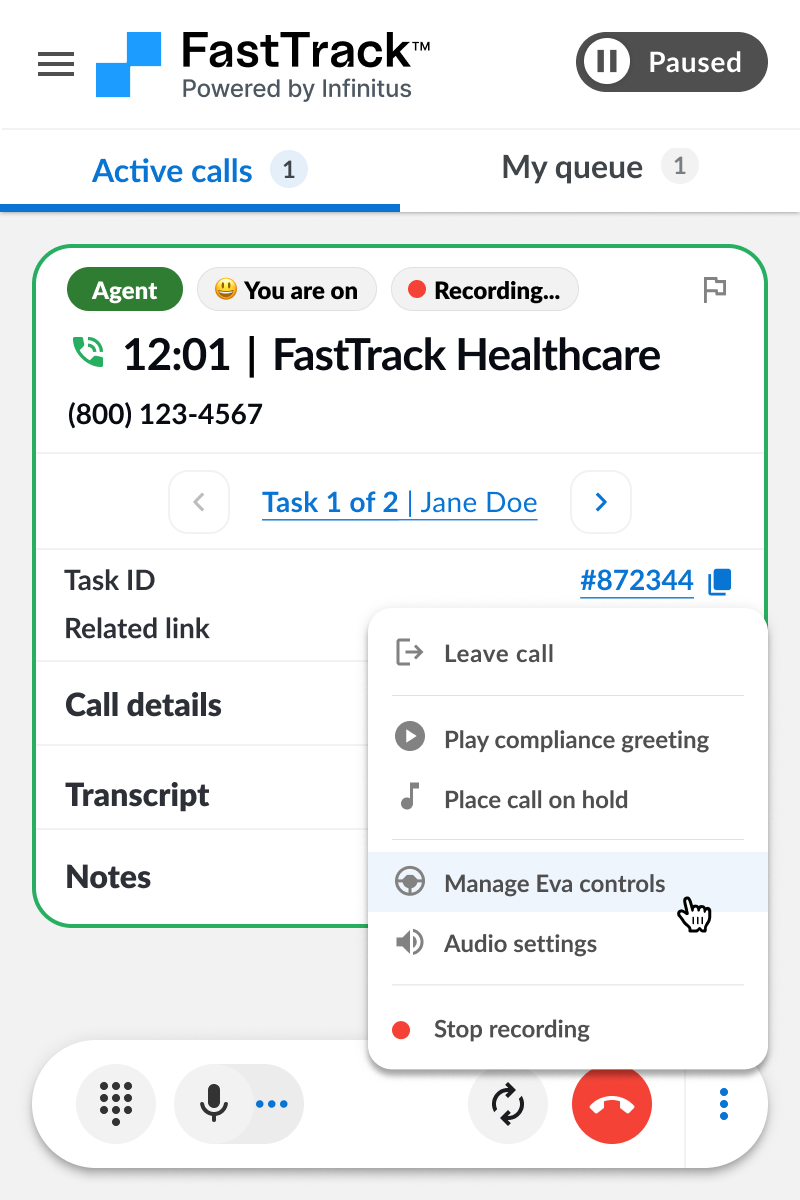
From the Eva controls screen you can adjust the call phase and/or control who is driving the call. Some common examples are:
Sending a call back to IVR and having Eva drive if you get transferred
Sending a call back to hold if you were brought in too early by mistake
Taking over the call from Eva to unblock during IVR and then giving control back to Eva to finish waiting on hold
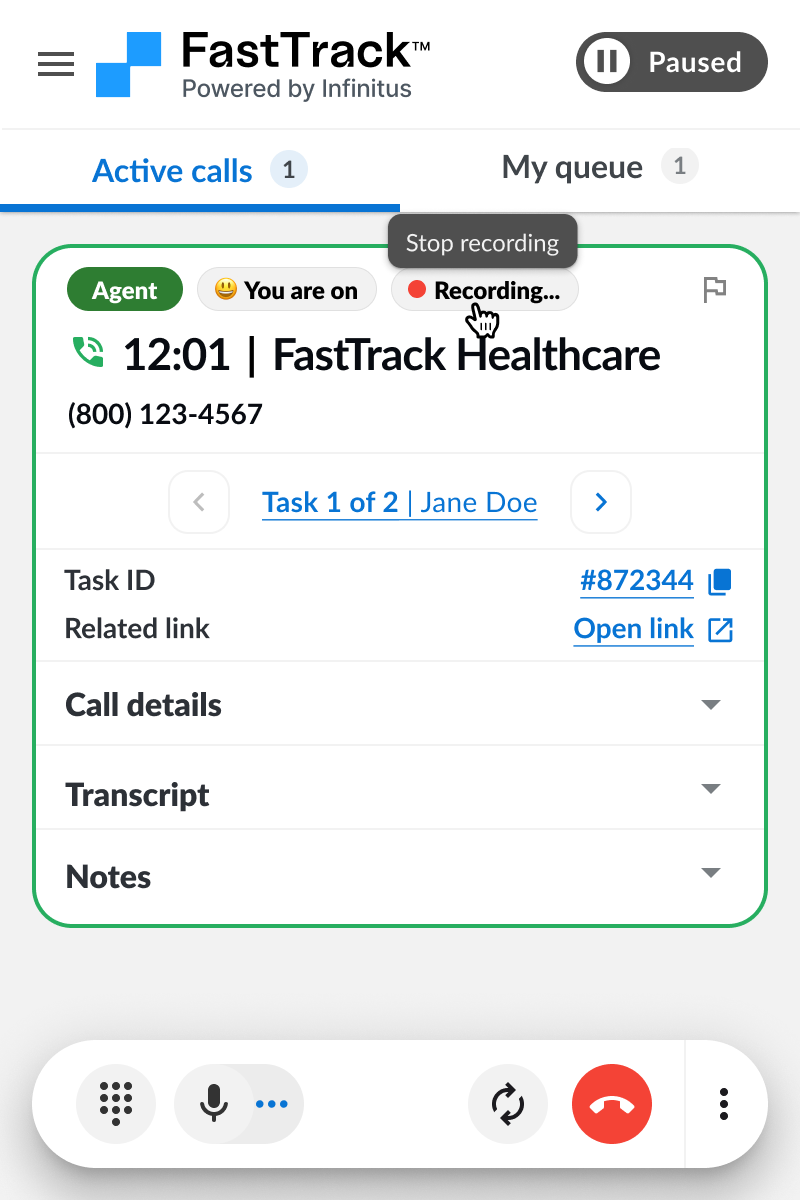
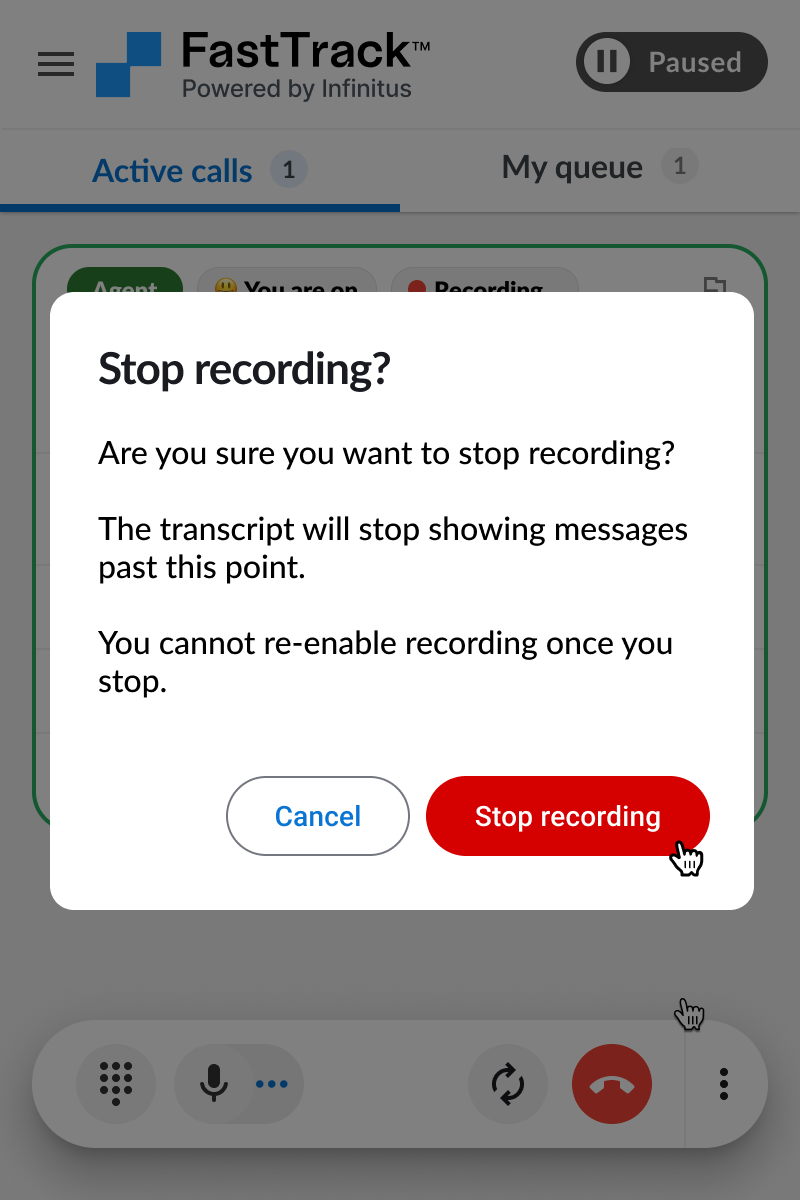
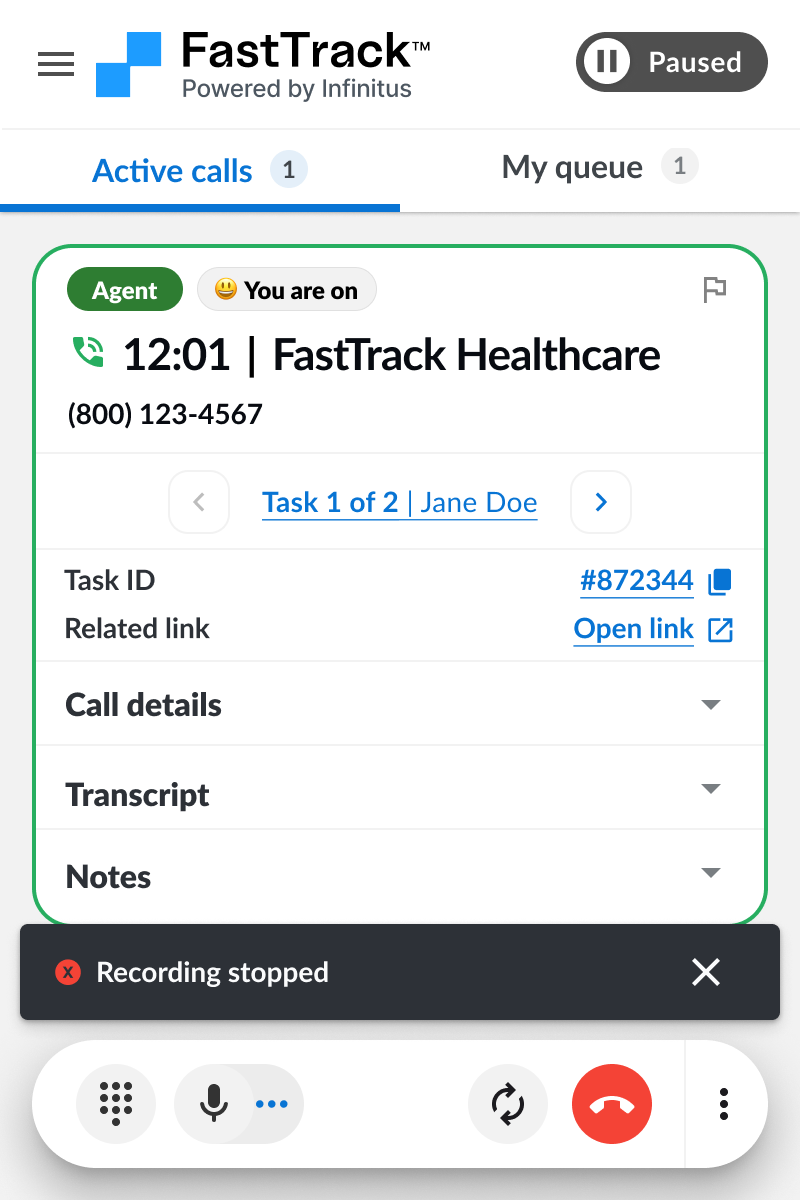
Stop recording
If the payer agent does not allow recording you can stop the recording of the call at any time.
Audio troubleshooting
If you are having trouble with audio on the call you can refresh your audio connection and check your audio mic/speaker settings to confirm you are connected to the right devices.
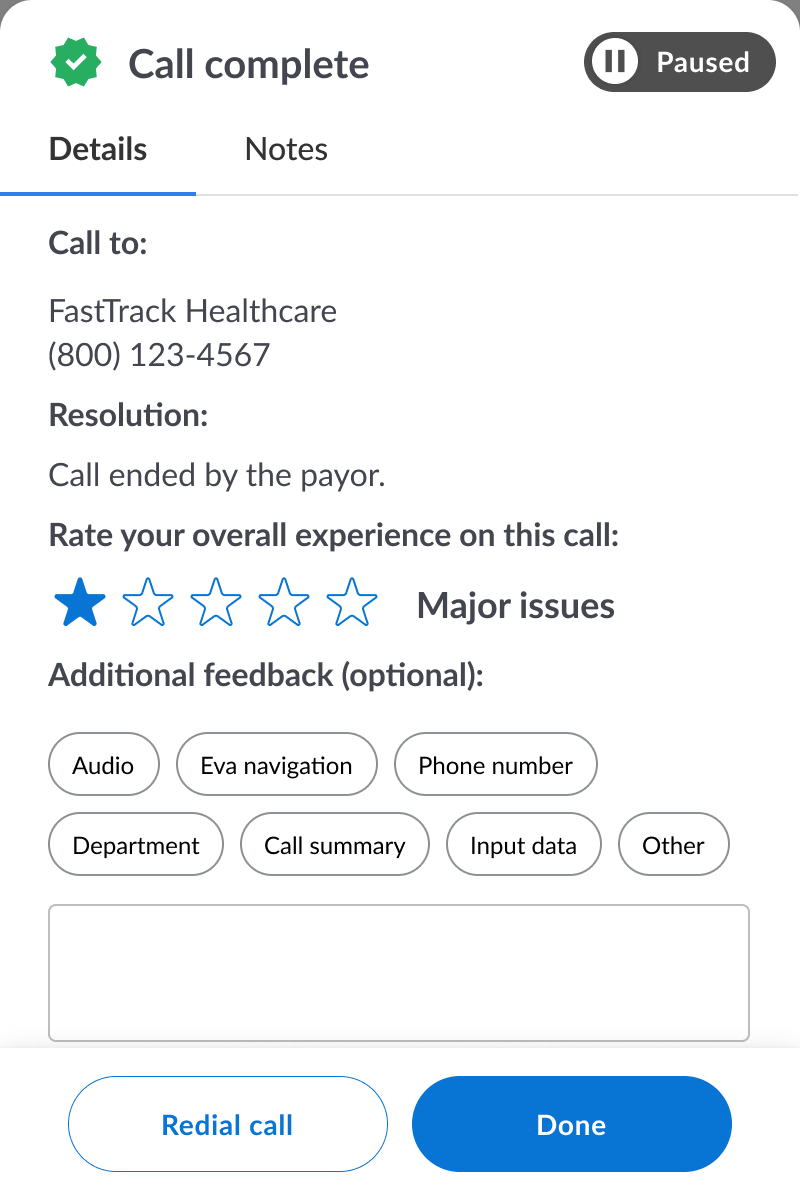
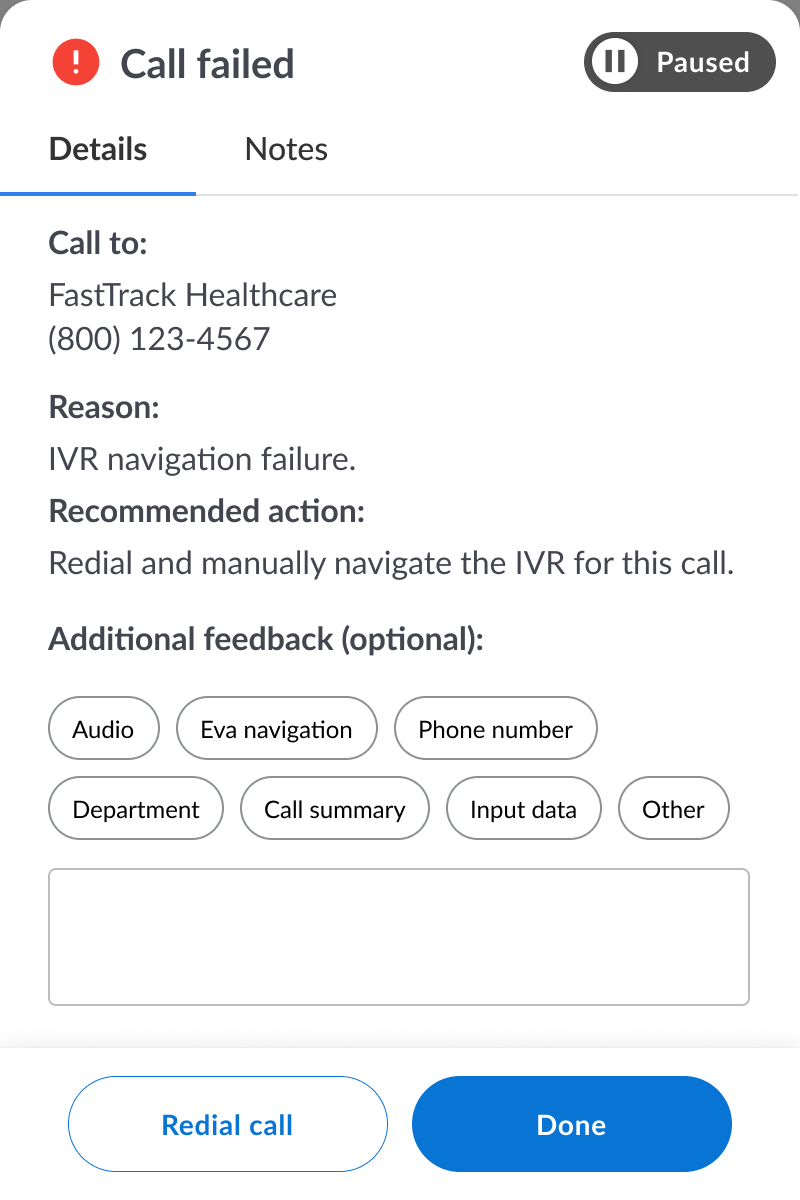
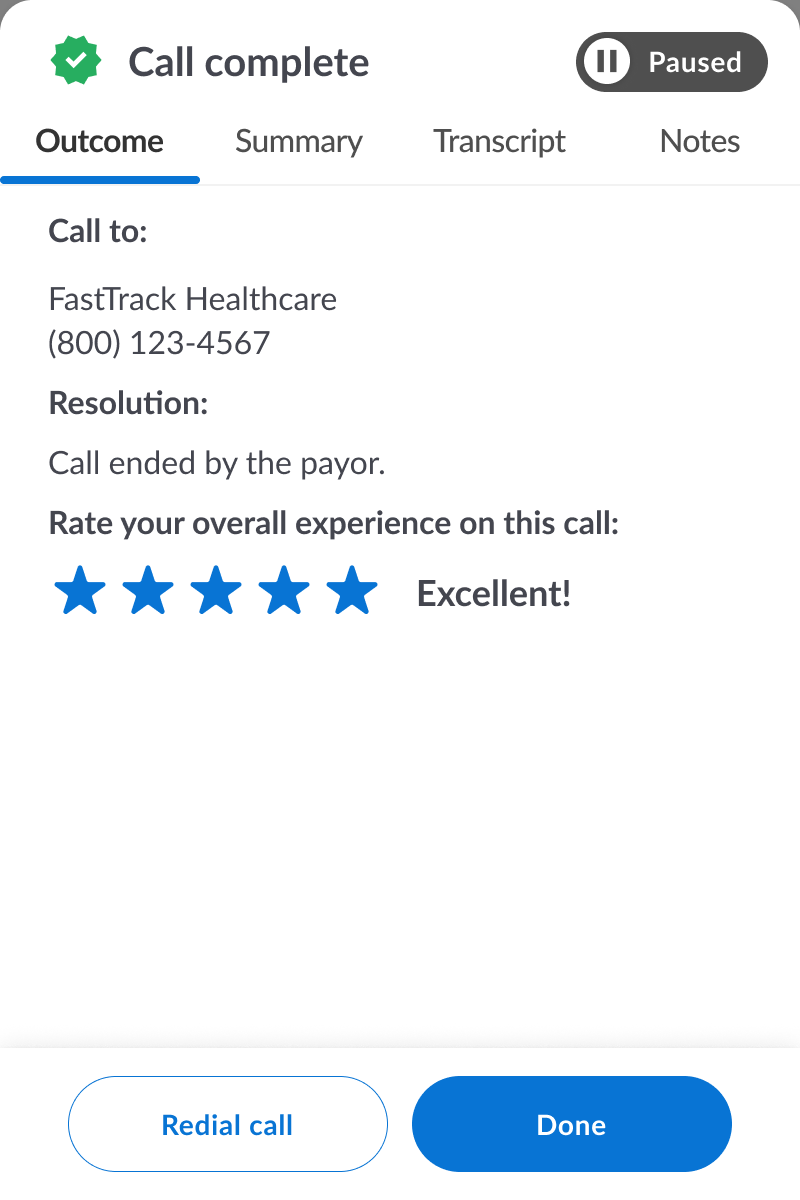
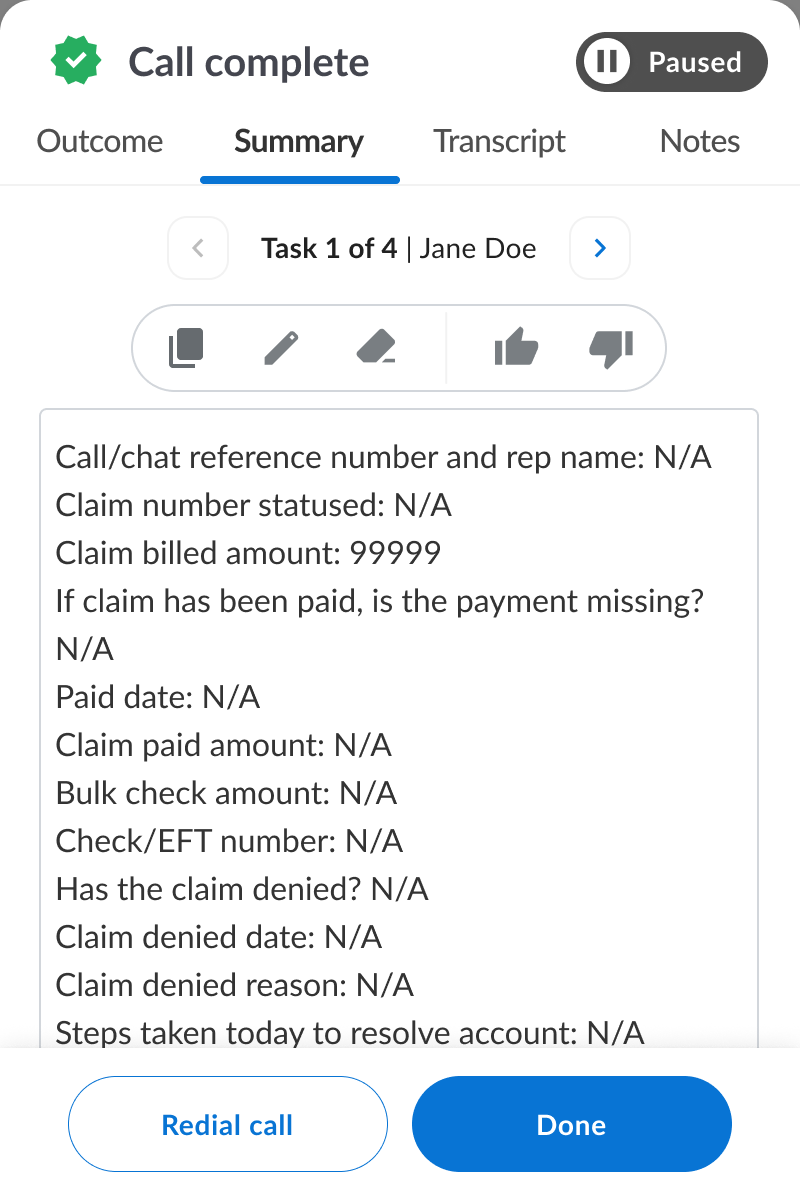
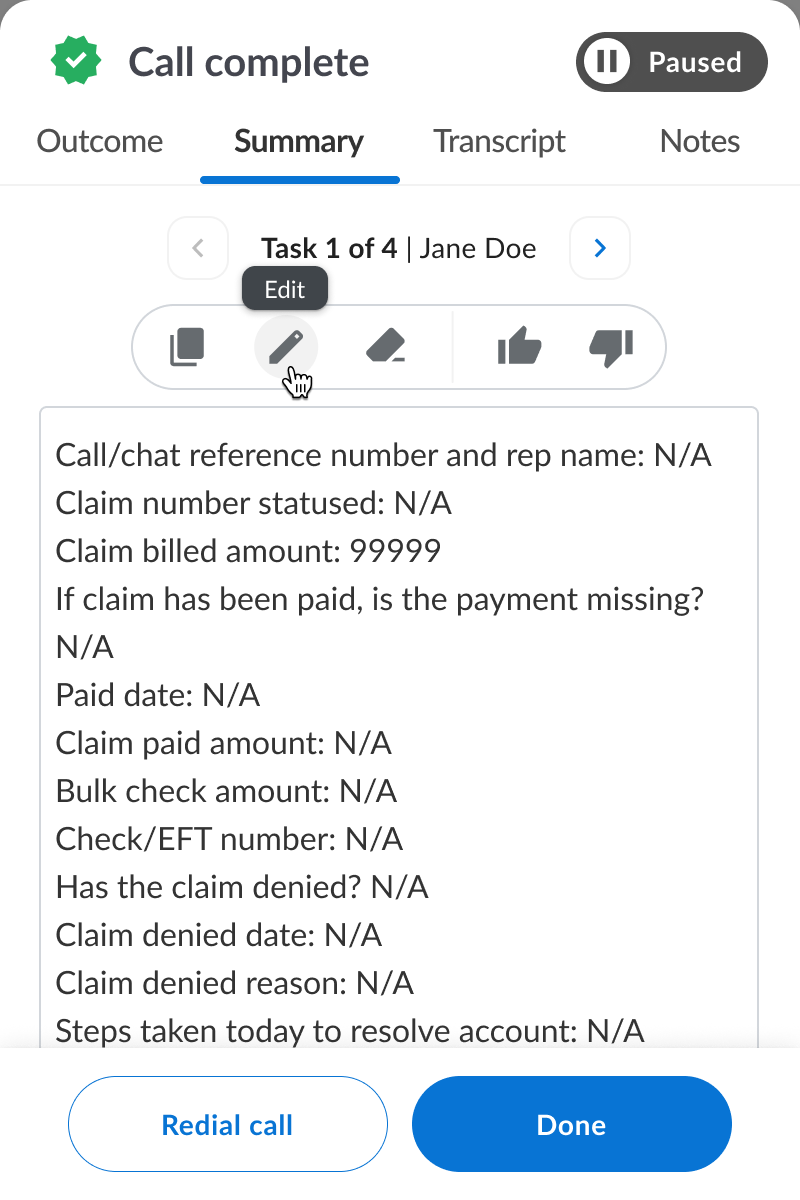
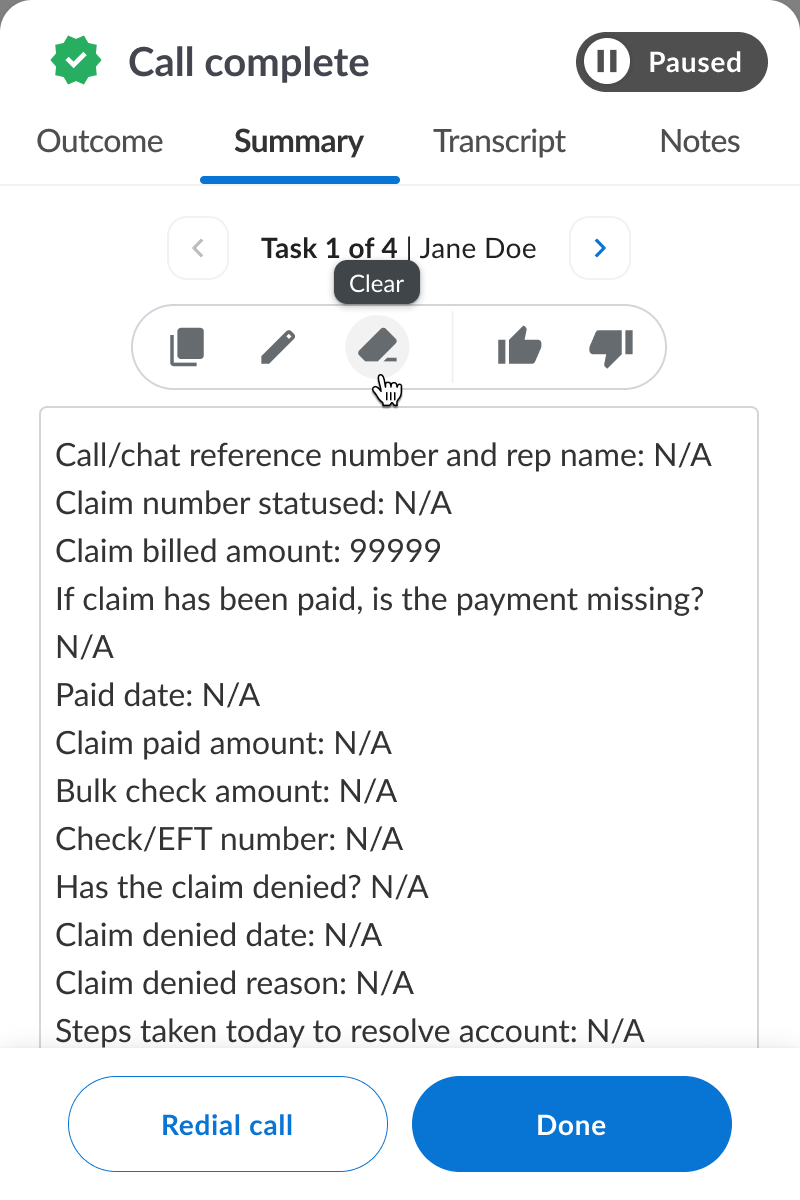
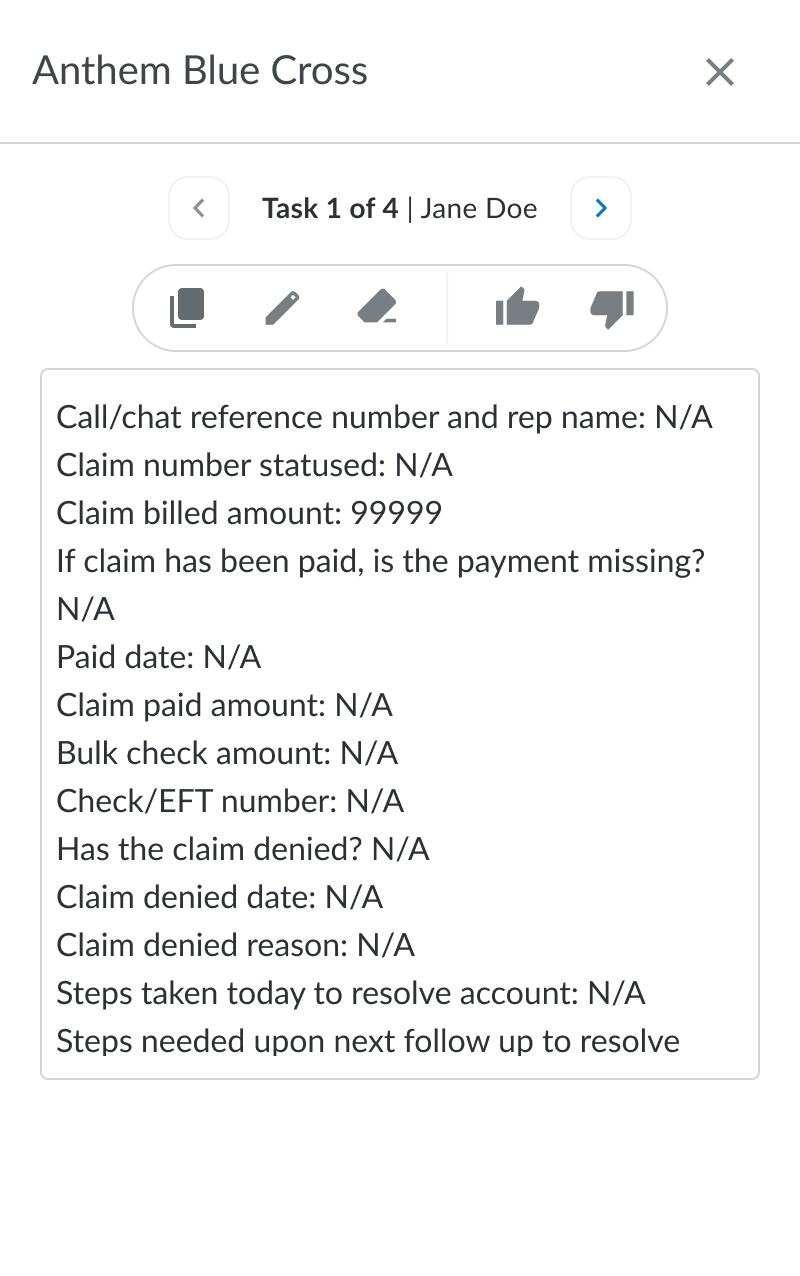
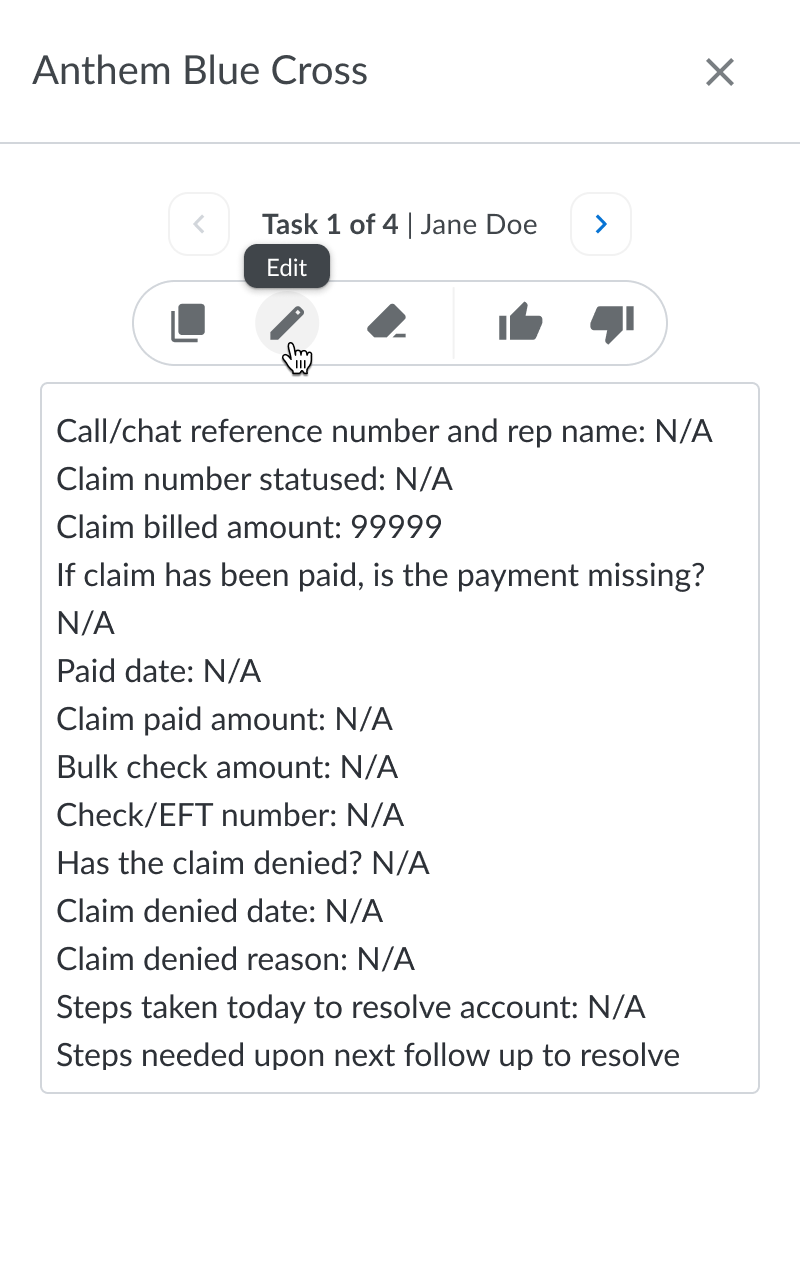
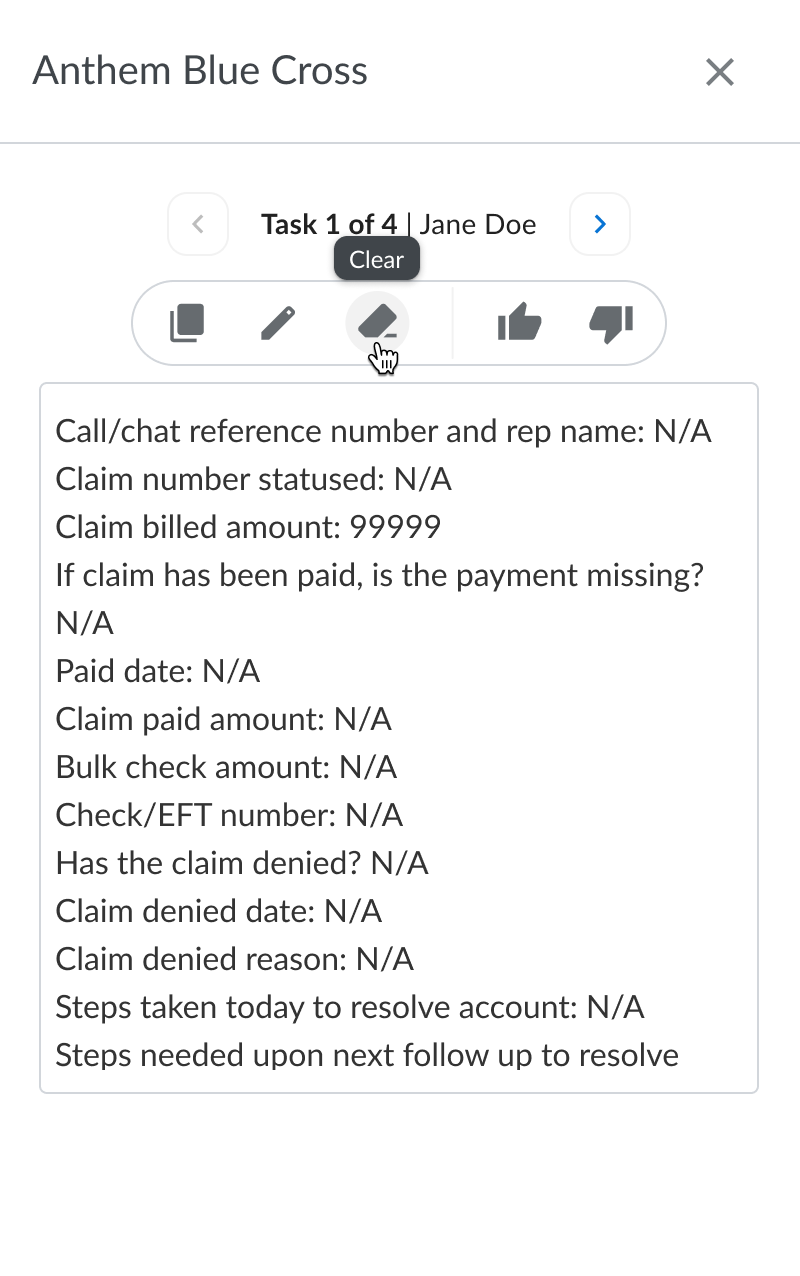
Post call review
After a call you can rate your experience and review the AI summary notes that were generated. If you need to make edits or remove any of the summary notes you can do so in this screen. If you need to redial 1 or more of the tasks on the call you can do so by clicking “Redial”. If you are done with the call you can click “Done”. The AI summary notes will transfer to your company data system automatically.
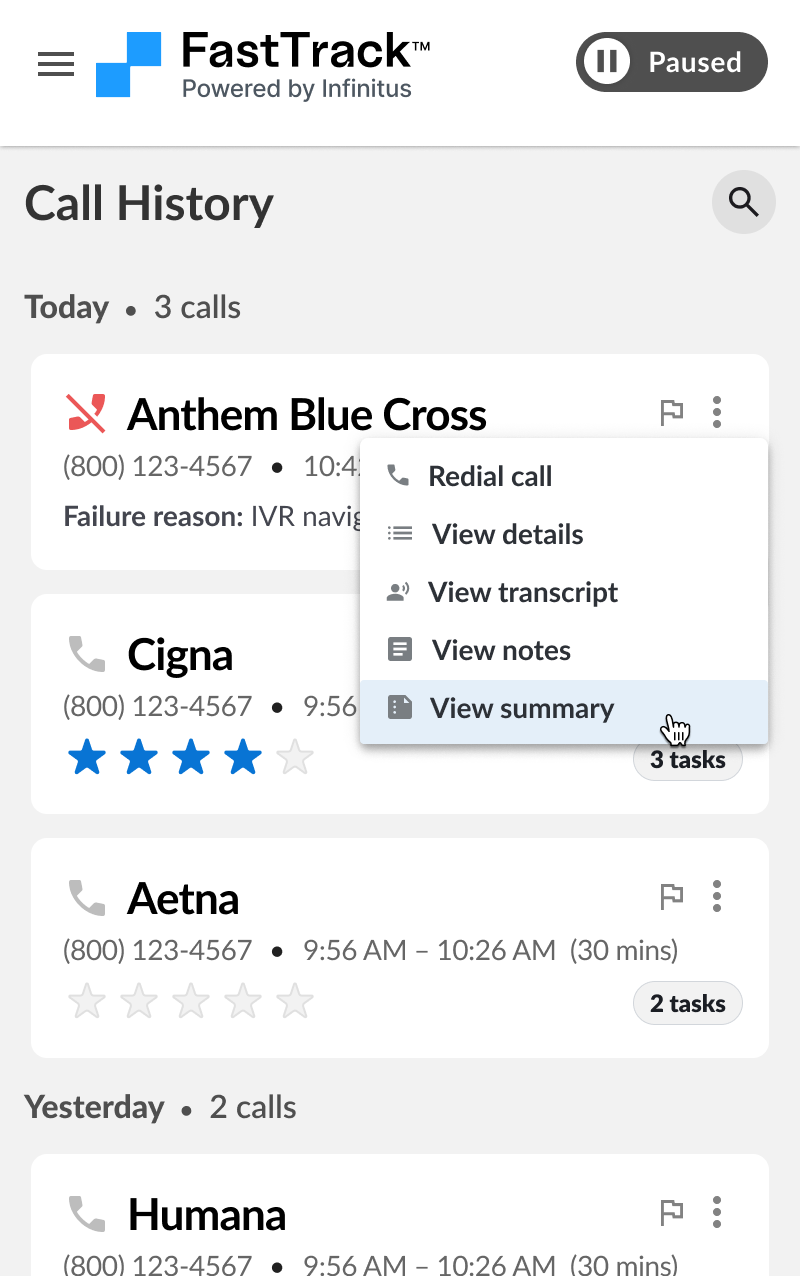
Call history
If you need to reference previous calls you made you can do so from the call history. From the call history you can redial a call, edit the AI summary notes or report an issue.
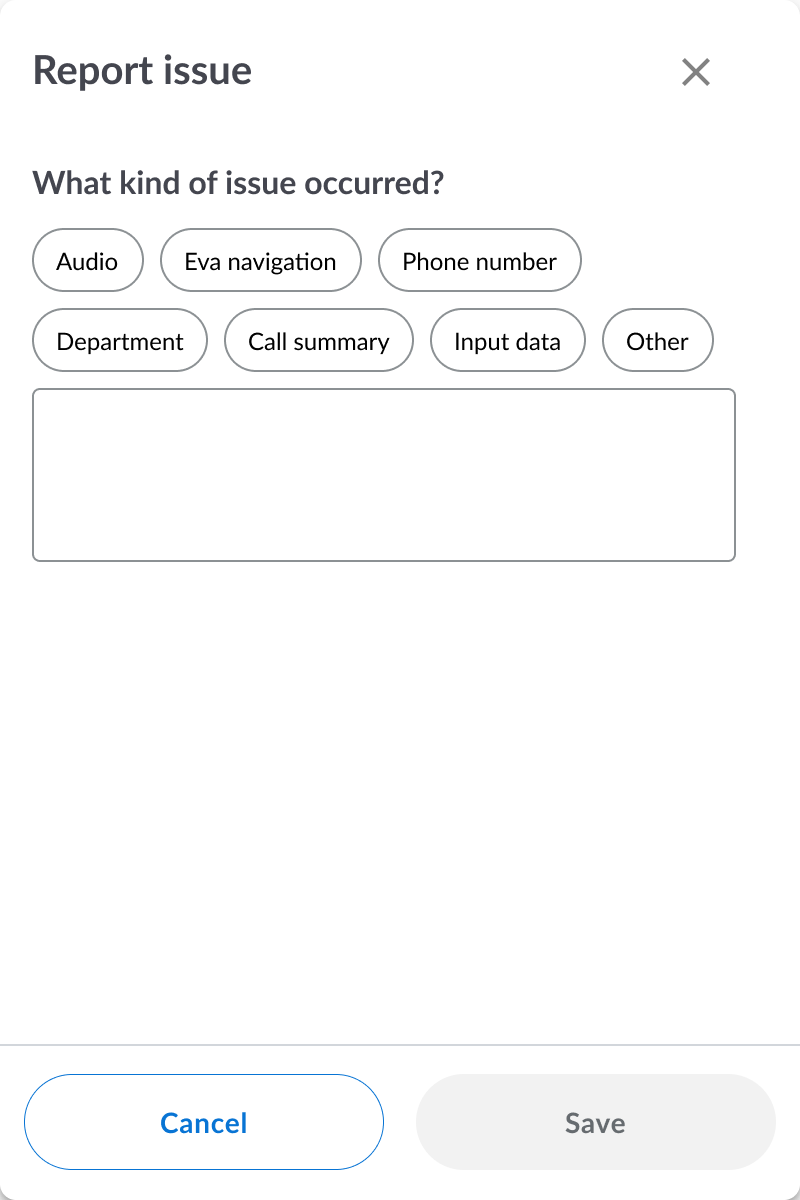
Report an issue
If something goes wrong during the call you can report an issue and our team will be notified. You can also provide feedback after each call.